Tuesday, May 29, 2018

Another Little Victim

Our tip of the week would make a great bumper sticker.  Slow Down!   Too much speed is the root of all of our students problems.  You can do something quickly over and over again or you can slow down and do it once the correct way saving yourself a lot of time and aggravation.   I watch people cut glass while they are paying the least amount of attention they can to actually following the line they are trying to cut.  The end result is a piece that's close but nowhere good enough.   Taking your time while cutting (moving slowly!) will speed things up immensely later on down the road.  Cutting glass isn't a race.  We seek quality cuts over a quantity of bad cuts.

One more time:  SLOW DOWN!!!

Let's start things off by saying that Linda F's Rose Heart Window is every bit as stunning as I expected it to be.  I may very well make one of these myself because I think it looks even better in person than it does in its pictures.  What a wonderful job Linda did on the soldering-- it adds so much to the window's appeal.


Rowena's Victorian Window is complete and a feast for the eyes.   She added a small round bevel in the center to help diffuse the flood of lead that all of those connecting lead lines would have created and it even tied in nicely with the four other circles that reside in the pattern.  Wonderful work all around.


Tasha's Cat Window is officially completed and it definitely has a Tasha 'ring' to it.  She has a unique style and it certainly shines through in this window.   I just wish the cat's whiskers were more evident in the picture because they really add a lot to the overall effect.


Betty completed her Multi Colored Cross Window and put all of the textured glass on the front of her window.  When using clear textures this isn't something that needs to be done but when using colored glass the texture is much more apparent on the back of the glass.  Because of that, Betty cut most of her pieces out backwards so she could then turn them around so the texture would be on the front side of the window.   Betty did a great job all around on this.


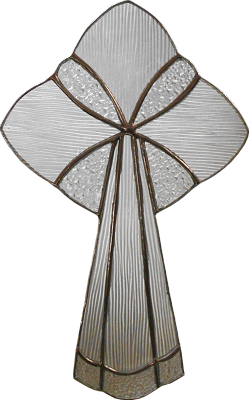
Linda F also put the finishing touches on her stylized Cross Suncatcher which she made with some leftover Fractures and Streamers Glass that she had.   Sometimes the glass makes the project and that is certainly the case with this project.


Carol made two Sunflower Lawn Ornaments this week and she needs no help at all when it comes to putting these together.  As always, her work is flawless.


Terry both started and finished this Large Cross Suncatcher in class this week and her use of just two simple textures is what really makes this look so stunning. 


Barbara H started working on a pair of Airplane Kaleidoscopes and is just about ready to begin assembling these into two separate Air Planes.


Tracey's address Window is well under construction as she now has both of the decorative end pieces all ground and ready to be wrapped.  You can see one of these end piece sections to the right of the numbers.


Tracey  also worked on an Airplane Kaleidoscope of her own and I've put one of the finished Kaleidoscopes that I've made next to her green pieces so you can see exactly what she and Barbara's pieces will look like when they are assembled.


Cindy is making excellent headway a logo panel and as you can see from the picture she's done a great job translating it to stained glass. When she returns we're going to add some teeth to the shark and that will REALLY make this even more picture perfect than it already is.


As expected, Lara got the lion's share of her background cut out for her Flower Of Life Window this week.  In fact, there are only eight pieces left to cut and then she'll be able to move on to the border for this window.  I just knew that this project would go quickly for her.


Susan D was busy working on Mickey Mouse Silhouette Suncatchers this week along with a beveled heart or two.  We'll surely see some of these completed when she comes back in.


This week we got to see Jan start on her abstract Poppy Window.   What you see is just the subject of the window because when this section gets tacked together Jan will add even more background glass and a border to make it much bigger than pictured below.


I only just realized the Linda L and Susan D are both working on identical projects.   Just like Susan D, I expect to see at least some of these completed upon Linda's return.


Martha was hard at work wrapping two bevel clusters; a boat and a lighthouse.  They will both end up being part of a single window which she'll start cutting glass for when she comes back next week.


Patrice started a Bumble Bee Lawn Ornament this week and she already has it all cut out and halfway ground.   There's a good chance that this will be all tacked together when she returns to class next week.


Melissa's Sacred Hearts Window is REALLY taking shape.   Both of the hearts have been cut out and the roses have already been cut into one of them.  The twisted thorn stems should be quick and painless after those roses and then the rest of the window will be a walk in the park.


Myrt got her Dog Face tacked together and then she ripped its snout off when she decided that she didn't like the way it looked.  The mouth appeared crooked to her and I applaud her for going through the extra work to make it look right rather than allowing it to be 'off'.


Mary Grace tacked together all of the pieces that she had ground and wrapped for her Iris Window and as you can see there really aren't that many pieces left to fill in before she can start working on the double border for this.


With just about everything wrapped in her Sea Horses Window, Becky will soon be ready to add her background glass.   To be honest, those large pieces will easily be cut in just one class so this will be done before you know it.


Roy spent his time in class soldering his Crab Window.  As you can see it is just about finished and although Roy plans on completing it while at home during the week he said that he would bring it back in so we could get a good picture of it.  His use of mottled glass works really well with this design and really gives this crab an extra boost of realism. I can't wait to see what he decides to do next.


Shelley got all of the center portion of her Cat Window tacked together.  She'll be adding a 'nameplate' between the bottom of the cat and the border and she's got her pattern pieces all traced onto the glass ready to be cut.  


Susan R's Chef Window is moving along at a nice pace and although she cut out mostly white pieces of glass that are hard to see on the pattern, she got an awful lot accomplished.  Before you know it Susan will be laying down the floor to this window.


Beth traced out and cut out all of her paper pattern for the Flower Window that she's about to start.   She planned on cutting some of this while she was at home but I have her box of tools so I don't think that's going to happen!  Nonetheless, we WILL see glass cut for this when Beth comes back in.


Brenda has begun work on a logo window of her own and between the two of us we got the final pattern ironed out this week. There are a lot of letters in this design so Brenda will be spending a lot of time getting them to line up perfectly. There's nothing worse that a window featuring bad handwriting!


And that wraps things up this week.  Memorial Day threw me off a bit so this is a day late, but it's here now and that's all that matters.

Paul
Bayou Salé GlassWorks


Tuesday, May 22, 2018

Does Your Dog Bite?

It's been a busy week but before we start looking at what our students have been working on let's review something that sometimes causes problems.   When working on a stained glass piece you need 2 paper patterns. One that you cut up into the individual pattern pieces that you trace onto your glass and then a second copy that you build your project on top of.   Most times we use a sheet of poster board for the copy you cut up and to make that copy we use a piece of carbon or tracing paper.

The thing is, people are always taping the pattern to the carbon paper and just laying it on top of the poster board.   If you do that then any shift of the pattern results in a copy that does NOT line up with the original pattern.

To prevent this place the pattern on top of the poster board and then tape them together securely along one side or the top of the pattern.  Once they are firmly attached with tape (pins don't work well for this at all) simply slide the carbon paper between them and then begin tracing.  If the carbon shifts nothing will happen, but if the pattern and and poster board shift you will always have a mess.   Remember to tape the pattern to the poster board to prevent any problems from occurring (unless you accidentally put the carbon in upside down!)


So then, Carol's Hummingbird and Flowers Window is complete and the bevels in the opposing corners add so much to the elegance of the overall design.  The border is perfection and the work is among the best we've seen.   Carol even redesigned the hummingbird in the pattern by herself!  Expect to see this done again because other people have said that they really love this window for good reason!


Jan's Crucifix Window is smaller than you may first think but that only makes it all the more impressive.   It sure turned out great but the finishing touch on this results from Jan not hanging it in a window but rather using it as a table piece by displaying it on a sturdy metal plate holder.  It's perfect!


Martha's Deer Head Window has been completed and it's such a great masculine piece.   After endless flowers and birds it's nice to see something a little different walk out the door.  Martha certainly did some wonderful work on this.


Beth finished two projects with us this week and although they have nothing in common they also have a lot in common as I will soon point out to you.  Up first is her Iris Window which features an iridized  blue glass for the flower petals.  Beth is really happy with how this turned out and I'm glad that she didn't give up on it.


Beth's second project was another one of her beautiful Celtic Knot Crosses which matches her Iris Window because she used the same iridized blue glass in both projects.   I can see Beth's ability to follow her pattern growing with each project she makes with us.


Linda made this gorgeous Mickey Mouse Window that she found online and he is one proud American Mouse!   Pay attention to how Linda ground the nose into the center of Mickey's snout.   The extra lead lines needed to cut it into place threw off the design so the 10 minutes it took to grind out an oval in the middle of the piece more than paid off in the end.  


Linda also completed another of her Cardinal Suncatchers which she can now essentially make with her eyes closed.


You've just GOT to love Susan R's Stained Glass Scissors.  I made a pair myself and they were the first thing we sold out in Alexandria, when we did our show.  Susan saw them hanging in the shop and decided to make a pair of her own and they are nothing short of perfect.


Susan D has two completed projects this week and we're starting off with her beautiful Ballerina Suncatcher which is displayed here in a beautiful gift box.  Maybe if I take up ballet I'll get a fancy suncatcher from Susan.   I know she loves to see me dance... (I have THE move.)


And this is Susan D's second completed project this week.   This tranquil Sunset scene has gone over very well in our classes with just about everyone requesting the pattern but I do believe that Susan is the first person to actually complete one.


Brenda wrapped up her final Beveled Transom Window and finished it off by coloring the lead black.   I always say that when you make a window out of nothing but clear glass you should consider coloring the lead black because the contrast is so striking.


Brenda also completed this Heart and Ribbons Window during class but didn't have the time to wash or color it before she left.  That's easy to do at home though and that means that she's got this job completed even if we don't have a great picture of it here on the Blog.


Brenda's sister Terry was in the same boat as well because she also managed to get her window completed before class ended but she was also unable to wash and color it.  Again, that's easy enough for her to do at home and then she won't have to wait another week before being able to deliver this lovely window.


Melissa's Sacred and Immaculate Heart Window is already taking shape with just one week of work into it. The hardest part (the small flowers that consist of 32 pieces fitting inside of a 1 x 5 inch area) is behind her so now Melissa will be able to relax and breathe a bit easier while working on this window from here on out.


Myrt has all but the background of her Dog Window cut out and as always her work is exceptional.  She's going to tack this together before she cuts out her three background pieces and once that's done you'll be able to see the white dog better while it's on the white pattern paper.


Susan R liked Shelley's Chef Window so much that she started making one for herself.  After finishing her Scissors Suncatcher she immediately began cutting this out and as you can it's all falling into place already.


Cindy's just about ready to wrap up her Metal Shark Logo Panel and I do mean that literally because this is all ground and ready to be foiled.   We'll see what becomes of this next week when I truly expect to see this completed.


With just a little bit of soldering left to do on the back side of her beautiful Rose Heart Window I'm anxiously awaiting the moment this gets some light behind it.   I think the design is beautiful and Linda has done an incredible job putting it all together to perfection.   As you can see she also has her Stylized Cross just about ready as well so I guess we can say that Linda has been burning the wick at both ends!


Linda L started this three piece Graduation Cap after Mickey was completed and I really think that these are going to be popular (especially since graduations are coming up now).   With only three pieces a person can easily make one of these inside of a half an hour.


Mary grace has all of the known pieces to her Iris Window wrapped and will begin tacking together these pieces when she comes back in.  From there we will fill in her missing pieces one at a time until this is ready for its border.


Rowena got all of her corner border pieces cut while she was in and then completely soldered the front side of her Victorian Themed Window.   With just the back side left to be soldered I'll say that this window is well on its way to becoming a highlighted window here in our Blog.


Shelley's cat is almost all wrapped now and although it looks like this cat only has one eye, that's only because she was wrapping pieces while I took this picture.   Look to see this cat with both eyes in place when she returns next week.


Susan D also has two complete sets of Mickey and Minnie Mouse Silhouettes all ground and ready to be wrapped.   These go together fairly quickly and they look adorable!


Lastly we have Becky S's Seahorse Window.   She's got most of her grinding done and is all set to  begin wrapping each of these pieces.  This window has a lot of detail in it but as I always say, "The extra work you put into a window more than pays for itself in the end."


And that about does it this week.

Paul
Bayou Salé GlassWorks