With our power out for most of the week a lot of our classes had to be cancelled. Then, when power returned, many of our students had things that needed to be taken care of at home so attendance this week was, well, weak. However, that doesn't mean that we didn't get anything accomplished as you are about to see.
Mary's Cross Window survived an assassination attempt when I accidentally dropped it the week before last. This week it's back together and finished as well. As you can see the dark colors have, for the most part, disappeared now that there's some light behind it. The cross itself is made from iridized glass which sets it apart from the clear glass that surrounds it. The contrasting colors were perfectly picked and the end result is inspirational indeed.
This is Jeannette's second 'Vette Window but this one has been done in a completely different color scheme. With black being the color of the car it was the obvious choice for a border color as well. Again, since this is the second time Jeannette has made this window, it went a LOT faster this time. As always her work is wonderful and she has another stunning feather in her stained glass cap.
Kerry put the finishing touches on his second Arrow Window and started that by splitting the two border pieces on the right and left sides. Once that was done we both agreed that it evened things out nicely and then he went to work soldering. By the end of the night he had this completed and took it home.
This is Angie's 'Tiger Eyes' portion of her two part LSU Window which is now all ground and even halfway wrapped at this point. This will be surrounded by a border and then another panel with the letters LSU in it will run beneath it and bordered as well.
This has to be one of the most interesting patterns I've seen yet. Annette's 70's inspired Poodle Window involves a lot of pieces but as I always say, the more you put into a window, the more you'll get out of it. Kudos go to Annette for not being afraid to tackle this multi pieced window as her second project.
Jeanne L's Circular Rose Window has been tacked together and her four corners have been attached to square it all out. With just two remaining borders to go Jeanne is very near completion on this project with all of the hard work behind her at this point.
Jeannette got the borders attached on her Magnolia Window and then proceeded to solder it. Her front side is almost finished and that means that the back side may very well be completed next week because this window is almost done.
Shawn got her Fleur De Lis all tacked together and worked on soldering her window. By the end of class she had both sides completed and only needs to touch things up at this point (and add some hooks to hang it by). This will be a finished project upon her return.
Lara is making great progress on her large Peacock Window. As you can see she has most of the tail feathers completed and ground into place. Once these tail feathers are tacked together Lara will work on the head and body of her bird. I'm sure that will happen when we next see this.
Rowena started working on some Mickey Mouse Suncatchers and got 4 of them cut out during class. then she started grinding them as well. I didn't manage to snap a photo so a picture of the pattern will have to do!
As I said, it was a very slow week due to the power being off for most of the week. Still, as you saw, we managed to get three projects completed. I think we'll have much better attendance in our next post as things slowly but surely return to normal.
Well, Hurricane Barry has us very late this week (this should have been posted LAST Monday!) so forgive us for disappearing for two weeks. We'll have another update later on this week but it will be very short in length due to the number of classes we had to cancel and also due to poor attendance since our students had issues of their own to work through after the storm/hurricane. Rest assured that things WILL return to normal-- the sooner the better!
Our tip this week is actually a reminder for our students. Please put your name on all of your tools using a permanent Sharpie marker and then cover your name with a layer of scotch tape. People forget their tools all the time and we put them in a 'Lost and Found' box. If your name isn't on your tools then you may not get the same tool back if someone mistakes yours for theirs. Pliers, cutters, foil, scissors, solder, etc. all look the same so mark your belongings with your name!
Moving right along we start things off with Annette who has completed her first window with us. So I'm just going to come right out and say it--this doesn't look like the first window that a new student would make, does it? Well, Annette worked very hard on this high difficulty Cardinal Window but the fruits of her labors are readily apparent. Also, she's amassed a wealth of talent by making something that wasn't easy to do. Her grinding skills are already formidable with just this one window having been made with us!
Linda F's Children In Raincoats was completed this week and her stormy sky perfectly sets the mood. Alas, we had little light behind this when we took the picture since the weather has not been agreeing with us lately so it's actually a little brighter than what you see below. It's as cute as can be though-- back lit or not!
Jan made this Air Plant Holder Panel out of different pieces of scrap glass that she had laying around. She's made these before and although people have asked about them Jan is the only student to have made any of these. So far.
Linda F also put the finishing touches on her Abstract Study Of Straight Cuts Window. This is another project that allows you to clean up some of the glass that has been floating around your work table for too long. Although this looks easy let me remind you that straight cuts are the worst kind of cuts to made because if they waver in the very least it will throw off the entire project. As you can see, Linda has achieved straight cut perfection.
Cindy made these two small hanging projects using glass that was donated to her. The mirror on the left has a landscape scenery etched onto it and Cindy added a border and some hooks to hang it by. The white portions in the suncatcher on the right also have etched patterns but try as I might, I could NOT get them to photograph!
Yep, Spinners are where it's at. Carol is knocking out Spinners very quickly in an assortment of designs and sizes. Once she make the first one and understood the concept she just ran off and made her own designs. Bravo!
Betty is working on a Lily and Iris Window that she has all cut out already. She's begun the grinding process and you might actually be able to see that she just about has that phase of the creation process finished as well. This window will surely turn heads in a few weeks or perhaps, knowing Betty, even in just one week!
Belinda's Patriotic Horse Head Window is nearly finished as she got her border attached and then the front side soldered. This window is her own design and I have to say that she's impressing me all around with her stained glass making talents.
Linda L is making some fast headway on her multicolored Owl Lawn Ornament. She's enlarged the pattern to almost twice it's original size but she's still able to use a lot of scrap glass to make this. Everything you see has even been ground already so she's very near completing this.
Jeff's very close to finishing the first third of his large Summer Themed Window. Once he gets the feathers in his Hummingbird cut and ground the rest will be easy because everything will be larger pieces of glass from that point on. With a little luck we'll see more of this design unfold when we see it again.
With her two borders now attached Susan D is ready to begin soldering her tribute Window. Susan has been working meticulously on this project and that's always important when there's a face involved. There's not a single piece off in this-- and that's something that's hard to say about a window.
Making excellent progress indeed, we next look at MiMi's Seafood window. She's moved along to grinding her corn and that means that she's nearly ready to wrap all of this so she can then control the positioning of her newsprint background glass. This is really going to make people sit up and say, "Woah! How'd you do THAT?!"
Shawn is mere pieces away from being able to tack her Stylized Fleur De Lis together and then adding a border. Before she tacks it she'll end up re-cutting 2 pieces of glass which don't quite fit right. The interesting thing is that we won't be re-cutting the obvious piece but rather the smaller piece. By enlarging it slightly we actually use less glass to fix the problem! Remember that there is always more than one way to skin a cat (whatever THAT means!)
Mary Grace has the front side of her Flower Window all soldered and is ready to flip it over. She's got her next project in mind and that always adds incentive to get your current project finished. It won't be long now on this one!
Cindy's now got glass cut out and ground for her latest Birds On A Wire Window. I've talked to her on the phone and she tells me that she's even further along now since the storm enabled her to spend more time working on this while at home. I can't wait to see what this looks like when she returns.
Kerry's latest arrow is almost complete needing just some solder to finish it off. I have no doubt that will happen when he comes back into class but before he solders it I'm going to suggest splitting the border pieces in half on the left and right sides of the window so they better match the top and bottom borders.
With the front of her Jessie Tree Window all soldered Jan is ready to flip it over and begin working on the second side. I'm thinking that she'll have this one completed in 2 more weeks. There's a lot of soldering in this window but Jan's stepped up to the plate in all respects here.
For some odd reason I don't have a picture of Tracey's Cardinal window even though I'd bet dollars to doughnuts that I took one. My mind obviously isn't what it used to be! And then there's Mary. Her window would have been completed if I hadn't dropped it (I kid you NOT!) It will be featured in our next update which will happen before the end of this week after I get the three broken pieces repaired. Luckily it's going to be an easy fix. So we'll end this post with one more tip: Hold on tight to your window so you don't drop it!
We're back! No you haven't missed any posts, we just took the month of June off. We've already begun to get back into the old routine but we resumed classes on a Holiday week so our attendance was a little low, but still worth posting!
Let's start things off with a quick but simple tip that deals with separating your pieces once you have them traced onto your sheet of glass. Take a look at the example below which represents 6 pattern pieces that have been traced onto some glass. The first step is to separate those pieces.
Here we see the same sheet of glass with red lines indicating the starting cuts that a lot of people try to make when separating. Sadly, this is wrong. Those curves are far too complex to strive for when there is a much simpler way. Remember that a straight cut is the easiest of all cuts to make while a curved cut is more difficult.
Here we see the same sheet of glass with the same placement of the pieces and you can see that it's all been separated using just straight cuts. Just look for the straightest lines that you can make and then new straight cuts will appear as sections of the glass are removed.
When separating your pieces never try for fancy cuts, make it easy on yourself!
Ok , so with that out of the way let's see what we have to look at this week.
Carol made a spinner this week and although it looks easy enough I have to say that these are a bit tricky because they are made in 3 dimensions. What you see below is NOT a simple flat suncatcher. You start by making three six 3" x 3" squares and then joining them in a way so they are equal in depth, height, and width. I know that makes little sense but the video will show exactly what I mean.
Here's Carol's Spinner in action. As you can clearly see this is a piece that needs a video for it to shine!
Next up we have Lara who made this Flag Panel in just one night and whose end result is wonderful. You just can't lose with an American Flag!
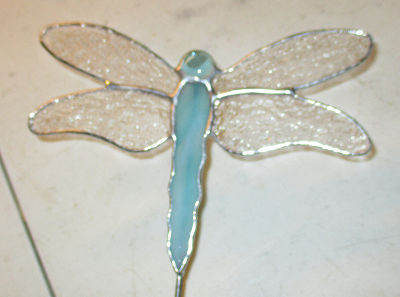
I wish my camera hadn't blurred this simple Dragonfly that Jeannette made this week. She's mounted it onto a rod so that it can be staked into in a standard flower pot. There's a stylishness about this design that really makes it stand out, blurry or not. Pure elegance!
Barbara H put the finishing touches on two more Butterfly Lawn Ornaments and I have to say that her soldering is looking better and better! Practice makes perfect and as you can see below the proof is in the pudding. (Whatever that means!)
For our last completed project we have a window that I made which I like to call the 'Faux Bevel Cluster Window'. Although you may assume that there's a bevel cluster in this design you would be wrong. It's just a mash up of different sized square stock bevels. There's not a single curve in this entire window which means that this very EASY to make-- if you take your time cutting each of those straight cuts.
Angie is working on a Tiger's Eyes Window and she came into class with it already cut out. Before class ended she had half of it ground! She didn't like the colors that she saw it was originally done in so she changed them up and I must say that it's for the better. The center of the eyes still need to be cut but we will do that AFTER the rest of this is ground (which I'm guessing will be next week).
Belinda got a lot of work done while we were away in June. With just a few pieces left to go she got her Horse Window almost completely cut and ground. I told her to wrap this before she cuts the few remaining THIN pieces of glass so she spent her night with us foiling pieces and by the end of the night this window was almost completely wrapped! She's worried about the eye so we're going to tack this together and then work out that important detail when she returns.
Susan R saw this 3D bird on the internet and decided to make one of her own. This bird itself is ready to be soldered and you can see that we've made a pattern for the leaf that it will mount on which doubles as a stand. You'll see exactly what I mean in our next blog post when this will be completed.
And Jeannette's latest Corvette Window is very close to being finished. This week she tacked it together and got her black border glass attached before getting the front side completely soldered. I'm pretty sure we'll see this window completed next week because Jeannette gets windows done pretty quickly!
Tracey has her latest Cardinal Window all ready to be wrapped. She doesn't care for the fit of two of her pieces so she'll be replacing them once she had the rest of this tacked together. Once things are ground you can't rely on using the paper pattern to re-cut a piece since things shift. Placing a piece of glass under the window and tracing the opening will give you a perfect fit every time.
With the first third of the subject of his Flower Scene all ground and wrapped, Jeff is about ready to begin working on the few background pieces and the humming bird of this section. First he'll tack what you see below so that nothing shifts while he's cutting and grinding the surrounding pieces. In fact, he could easily start working on the subject matter of the second third of his window before he cuts his background for this section. That would be fine to do.
Annette's Cardinals Window proved to be a bit perplexing this week when it came time to put a border on it. We initially tried to come up with two colors so that this could have a double border but in the end this beautiful green/brown mix was all it really needed. The front side is all soldered so I have a sneaking suspicion that this will walk out the door all ready to be hung next week.
Linda F was certainly busy during the month of June because she's got not one but two(!) projects just about completed! Her Geometric Window is all set for solder and her Children with Umbrellas just needs the second side soldered before it is finished. I know that we'll see at least one of these featured among our completed projects next week.
Jan's Jessie Tree is just about ready to be flipped around and soldered on its back side. We had discussed replacing the bottom clear piece with either green of brown glass but I'm unsure if she ever mad up her mind about that. We'll find out when Jan returns and then work from there.
Susan D has permission for us to show exactly what it is that she's been working on so here's our first real look at this window. Based on a photograph, Susan drew up the pattern on her own and the likeness and exactness is uncanny. There's just one border left to add to this and then Susan will be able to jump into the soldering process.
Mary got the front side of her Cross Window all soldered and then flipped it over to begin the back side. I have no doubt at all that she'll be able to get this finished upon her return and I can't wait to see this hanging in a window with some light behind it.
MiMi's about halfway completed the grinding of the seafood portion of her window. Once this is all ground she'll tack it together and then work on the background glass. Normally we would cut the background and grind it along with the rest of the pieces but MiMi is using a glass that she needs to have lined up PERFECTLY and this is the only way to achieve that.
Wow, Martha has her Tulips all cut, ground, wrapped and tacked! That means that this should be yet another window that we'll see completed upon her return next week. This window isn't quite like other windows and you'll see why when you see it completed.
Mary Grace was able to get her final border attached to her Flowing Flowers Window. Next week she'll attach the corners and the channel and then she'll be able to begin soldering this beast! I'm hoping she's feeling better because she had a rough time during class this week.
Here we have a look at Shawn's Stylized Fleur de Lis Window which she now has almost completely ground. It's all about pinning a new piece into place and then replacing all the other pieces around it to learn what has to be adjusted on the new piece.
Lastly we look at Cindy's next project which is one of her favorite (and best selling) pieces-- Birds On A Wire. Her pattern is ready to be traced and she's got all her scrap glass lined up for a very colorful project.
So that wraps things up for our first class in over a month! It was fun to be away so long but I will also say that it's good to be back.