Monday, March 26, 2018

Accentuating The Positive

Our tip this week is to be gentle when using your glass cutter.   You should apply a firm amount of downward pressure but you should never see a white line  where the cutter has passed.  You should also hear a gentle 'zip' and not the harsh sound of grinding glass as your cutter passes over the  glass.   Too much pressure makes pour glass break erratically.  Remember that you are dealing with glass -- too  much pressure causes it to break!

So with that out of the way let's look at Barbara H's Tulip Window which is an amazing work of art.   With hardly any background at all, this colorful window  makes its statement through Barbara's truly impressive workmanship.  The number of pieces in this pattern make it a very difficult window to tackle but Barbara handled it with ease.   And as I always say, you get back out of a window what you put into it.  Busy but elegant, this is a beautiful piece.


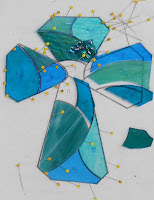
Angie had purchased a pre-cut cross kit a while back and decided that with Easter right around the corner she would sit down and get these three crosses together.   The good news is that -- there is only one cross that can't be made without the kit and that's only because it has a filigree in the center of it.  I will say that they all look great and now we know how to make them without a kit.


Rowena finished her large Cross Window and, as always, managed to do yet another wonderful job.   That fact doesn't surprise me at all because Rowena can essentially make a window a week now and  needs no help what so ever. As a teacher I'm very proud of her accomplishments. 


Rowena also completed a Cross Suncatcher and a Modern Art Suncatcher as well.  I really want everyone to pay close attention to the center of her cross.  The solder forms a perfectly symmetrical bead which can only be done with precise cutting, grinding, and foiling (as well as some impressive soldering skills).   These are perfect.


Carol was busy as a bee working on two three dimensional Butterflies that she will be hanging on a wall.  She's used iridised glass in  both of them to provide a splash of color since these won't be back lit.  These were finished before Carol left but she hadn't been able to wash and color them.  That she can easily do at home so we're officially calling these completed!


Becky S is making great strides on her Seahorse window and although you may not see it, there are probably 30 pieces that are almost microscopic in size.  With only two colors of glass having been used so far, Becky has utilized the light and dark sections of her glass to their fullest potential.


Shelley's Master Chef is all tacked together and she was able to re-cut the piece that somehow broke while she was transporting this window.   We'll surely get a border on this when she returns and then we'll see where she gets to from there. 


Roy has started a new project this week and he's already got all of his glass cut out for it! He seems to really be enjoying this new hobby and he hopes to come back in next week with this Hummingbird Window all ground, wrapped and tacked together.


MiMi is flying through her Rose Window and was able to get all of the glass cut for it this week.   With each cut she's learning what can and can't, should and shouldn't be done when scoring glass.   As you can see, she's a quick learner because as I said earlier, this window is all cut out and ready to be ground.


Tracey's Cardinal Window is all completed save for the hooks and a bird bath!  This week she finished soldering the front side and then flipped it over to complete the back as well.  That means that she'll be coloring this and taking it home when she comes back in.


Linda F started out making a Texas Star Suncatcher and ended up turning it into a full fledged panel by adding a background and two borders. Once her final blue border is wrapped and tacked, Linda will begin soldering this very patriotic Texas Window.


Jan has started a new project this week and as you can see,  it's a religious icon.  Jesus has his background and robes cut out and when Jan returns she'll surely cut the cross and the body.   This is a small piece measuring only 6 x 9 so the amount of detail that can be incorporated into this design had to be kept to the bare minimum.  However, in this application I can see it working out really well.


Linda L has all but the legs attached to her five Ballerina  Suncatchers and they will surely be completed upon her return.   The amount of wire work on these is astounding and extremely intense so these ballerina's aren't nearly as easy to make as you might believe.   I can't wait to see these completed.


Well now, it looks like Susan R is just about ready to put her Pelican together.   She's got everything wrapped and tacked and is working on soldering each section as we speak.  I have a funny feeling that this will be completed upon her return..   This will be fun indeed.


This week Melissa ground and tacked together the thin border that runs between the eight Fleur De Lis' in her Geometric Window.   Once that was done she began grinding her background glass.   She had cut them as eight large continuous pieces and will then break them into smaller individual pieces which she'll mix up as she grinds them.   This results in a random color placement that Melissa is thrilled to see happening.


Tasha brought her Cat Window back in to be worked on and she now has her multi colored border attached and a channel applied to hold everything into place.  She's worried about her soldering on the front side but I honestly have to say that there's very little to worry about.   Her biggest concerns are the area's where multiple lead lines intersect and some thicker lead is always to be expected in areas like that.   It's just a limitation of the art of stained glass.


Terry's Plate Window has been completely assembled and she's already begun the soldering process.  With the front side finished Terry only has a few lines left to go over on the second side.   Since she works at home on her stained glass I'm thinking that this window is already a done deal.


Myrt's Fleur De Lis Window is all soldered save for the back side and even that is more than 75% completed.   That means that next week this will be among our completed projects at the top of the Blog.   Be sure to come back and check this one out when it gets its close up.


Martha's Deer Head Window is very close to being completely ground now.  With just the background glass above the antlers left to fit into place, Martha should begin wrapping her pieces when she returns.


Cindy continued working on her Birds On A Wire  project and they are coming together at a nice steady pace.   This is a great pattern for using up all of that scrap glass that students accumulate as they ply their stained glass skills.


Susan D worked on getting her Peacock wrapped and she's so close to finishing it that I don't see how she wouldn't get the background cut out for this upon her return.  This peacock is her own design and I think this has bolstered her artistic confidence immensely.   Sometimes it's just  getting that first drawing done that allows you to understand that you CAN make a pattern!


Lara got her Indian Headdress Window all tacked together this week and even got the channel attached as well.  That means that Lara will be soldering when she returns and that also means that she's nearing the finish line on a window that many of our other students are eagerly following week to week.


Brenda's second Transom Window is already very near completion.  With everything tacked together save for the final border, this will finished before you know it.


Rowena also worked on this second Cross Suncatcher and again you can clearly see how perfectly she  manages to get the lead in the center to pool evenly.  This is a skill that all stained glass artists should strive for.


Betty did a repair this week and also worked on this Cross Suncatcher.  It's been a very popular pattern and soon I hope to have the story behind this ornate design.


Patrice is about to start on  a 4H Window with a geometric background.  She's traced out her pattern and has her glass picked out so we'll see some major progress made on this upon her return.


Next week is Easter and we won't be having classes which means that we will be MIA online for the next 2 weeks.  Everyone have a GREAT Easter and we'll see you all soon.

Paul
Bayou Salé GlassWorks


Monday, March 19, 2018

It's Down To The Wire


This week we're going to discuss a pattern's 'aspect'.  Aspect ratio's are always involved when drawing patterns and it's something that few people think about so I figured it's time to touch upon it here.  When choosing patterns it's very important that the window you want to make is close in measurements to the finished size that you will need.

Let's take the following pattern for example.   It's a square window which measures 24" x 24". 

 
If you needed to resize it to make it 36" x 18"  you'd end up with the following pattern.  Sure it looks fine as a pattern but it only bears a passing resemblance to the original design.  If the person you were drawing this for was expecting a circle in the center they'd surely be disappointed.


Let's look at another pattern, also measuring 24" x 24".


Lets change this on even more drastically.  If we need to resize it to 48" x 12" (twice as wide and half as high) we get the following pattern which again is usable but it's very obviously stretched.   


Below I've kept the center flower the same size (the same aspect ratio) and just cut off half of the top and half of the bottom.  Then I extended the lines on both the right and left side so the window fits within the measurements required without changing the aspect ratio of the flower in the center. This is much better than the pattern above, don't you think?


Since our first example features a design that runs out to the edges of the pattern, a major redraw would need to be done to make it acceptable and even then it would still vary greatly from the original.

So, if you need to scale something to a certain size you need to be sure that the original pattern is close to the same aspect ratio of the size you need it to be.   Also, if the design extends to the borders, you will certainly be facing even larger problems especially if it involves flowers or animals.

So with that out of the way let's have a look at Linda F's Victorian Themed Window which is certainly a beautiful design that has been marvelously executed.   The symmetry is spot on and her soldering is nothing short of amazing.   Gone are the days when I'd touch up Linda's soldering.   Her use of Cathedral Glass throughout the entire window really makes it sparkle when it has light behind it.  (Referring back to our tip- imagine this window half as high and twice as long.  Let me say right now that it wouldn't be pretty.)


Patrice's Sunflower Window is  technically the first window that she's made all on her own and let me say that it is gorgeous!  She's done a spectacular job all around on this and I already know that we'll be seeing some incredible projects being made by her in the weeks to come.


Roy's first window was done in record time and looks like a seasoned pro made.  Windows consisting of straight cuts are among the most demanding projects since any variation in those straight lines are easily seen by the eye.  That said, Roy's Cross Window is perfection.   Up next for Roy is a Hummingbird scene and we'll see what that looks like when he returns next week.


Jan put the finishing touches on her plate window and it is striking indeed.  I worried a bit about filling in some small holes that surrounded the plate but they filled in with solder without a chance of anyone noticing even after I've pointed it out.  In the end it was best to NOT fill them with glass.   Jan's window has inspired another window that will be very similar yet very different as well.


Angie finished her Bird Of Paradise Window and it's one that always turns people's heads.  She has a fish window cut out but it wasn't tacked together yet so it was difficult to transport to the shop.  This window is a very portable size so she finished it with the hopes of having her next window ready for a border (or two) when she comes back in.


Betty completed her Sunflower and Bee Window this week and did a great job with the soldering.  I can honestly say that not a single touch-up had to be done on this.   After some hooks were attached Betty washed and colored her window so that it could be ready for its picture among our completed windows this week.


Brenda completed her first of 2 Beveled Transom Windows and does it ever sparkle when it's got some light behind it.   In this rare instance the camera was able to catch all of the facets that the bevels introduce to this elegant piece.


Linda L has all of the glass pieces soldered together on her five Dancer Suncatchers and she's only got some wire work left to go on these.  She's got her copper wire  ready and next week these will be on the final assembly line!


MiMi has started a new window and it's a stylized rose design that MiMi is knocking out quickly and efficiently.  This week she traced her pattern onto poster board and then cut that poster board pattern into its respective pieces.   From there she traced the petals onto some pink glass and even managed to get all of that pink glass cut out as well.  Since this window consists of large flowing curves (in contrast to her last window) I suspect that she'll grind this fairly quickly.   As you can see she's having no problem cutting it.


Lara now has all of her background glass attached to her Indian Headdress Window and I can honestly say that she's doing another  great job with this.   She's also got her thin inner  border cut and ground so that means she's just about ready to get that final border cut and attached.   She'll be soldering this before she knows it!


Mary Grace now has all of the green cut out for her very large Iris Window.  As I said last week, you can really see what this window will look like now that all the green is in place.   There's just the background left to cut out and once that's done then Mary Grace will begin grinding this beast!


Cindy has begun work on another Birds On A Wire Suncatcher.  Calling this a suncatcher is a bit of a misnomer since it measures about 18" wide, but there is no background so you certainly can't call it a window.  Nonetheless, it always turns out to be a best seller for Cindy and this one will be  no exception I'm sure.


Terry began working on a plate window of her own but this one is more plates than glass!  Utilizing four clear textured plates and a small bit of cobalt blue background glass this is a window that will sparkle in a VERY attention grabbing way.  Oh, and there's a small round bevel in the center with a double ring.


Beth resumed work on her two Crosses this week and she's got them both ground with one of them being wrapped in copper foil as well!   She's taken the remaining unwrapped pieces home with her so she should be able to begin soldering these two crosses when she comes back in.  I have a sneaking suspicion that these will be completed very soon next week.  After that she'll be able to start a third cross (in yet a different style).


Shelley's Chef Window is all ground and this week she's begun wrapping it.  She cut the buttons into the front of the chef's apron AFTER it was all ground .   We handled it the same way I demonstrated in our tip last week about the Owl's eyes.   The next time Shelley needs to use this technique she'll be ready for it.


Martha has all of the face section of her Deer Window ground and next week she's going to start on the antlers.   If you look VERY closely you might discover where her background glass had a slight break that she'll cover by enlarging two of the antler pieces.  It's far easier to handle it this way rather than re-cutting the expensive and very thick piece of background glass which could very well break again.


Myrt now has all of her Fleur De Lis Window cut out and tacked together. All but the border, that is. She's already picked her glass and the strips are cut, ground and ready to be wrapped (I just don't have a picture of the border!)  Next week she'll begin soldering this and there is a distinct possibility that she will have it finished before the night ends.


Susan R has all of her Pelican  ground and has even well begun the wrapping process.   She also spent some time working on the small fish that acts as a pull for the wings on this piece.  When she solders this she will solder it as 4 separate suncatchers-- the body, two wings, and the fish.   And once they're soldered this will go together fairly quickly.


Tracey has her Cardinal window almost completely tacked together and she's about to get the birds feet cut out as well as the branch that they perch on.   Since she didn't have pattern pieces for these we left them blank and will now trace them from the opening that has been left behind.  With her border all cut and ground  she'll easily be soldering this upon her return.


Melissa has just about all of the glass cut for her Geometric Window and next week we'll go into detail about how she's cutting her final border sections the easy way.  She's been concerned about her color choice for the outside edge but I think this all goes together beautifully.


Rowena  worked on this Cross Window and is all set to attach her border.  That can only mean that this will surely be completed when Rowena returns because she can make short work of the soldering process.


Barbara H has begun soldering her Tulips Window and she's already got the front side finished.   In fact, when she comes back in she may very well have this completed because she's taken it home with her to hopefully solder during the week depending on how the soldering looks, she may be bringing it into class for the last time.


Susan D made great strides on her Peacock Window this week and now has all but 11 pieces ground.  Once this is wrapped and tacked together she'll cut out her background glass and decide how she wants to handle the Peacock's crest.


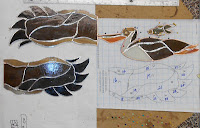
Betty also started work on this LSU Tiger Claw Window which always confuses students when they make it.   Because some of the subject matter cuts into the multiple borders we tend to see people cutting everything out at once which is the trap that Betty fell into here.   We ALWAYS  ignore borders until the subject itself has been cut, ground and tacked together.  Cutting borders first makes things become far more difficult because adjustments can't be made and all other cuts need to be perfect.  That said,  Betty has all of the skill necessary to complete this window and make it look great-  She just approached it from the wrong direction.


Here's Brenda's second transom window well under way now.  Next she'll add the background pieces and then tack it together for its final border.


Lastly, Becky S has begun cutting pieces for her seahorse window but she got out the door without my getting a picture of it.   That won't happen again next week-- mark my words.


So that's it this time around.  We'll see you again in 7 days!

Paul
Bayou Salé GlassWorks