Wednesday, April 29, 2015

Spread Them Out Closer Together


Applying flux is something that many stained glass makers don't think twice about but if you know how flux works you can make a few small changes that will make your soldering go easier.  Which brings us to this weeks tip.   Most people use a generic flux brush to apply their flux.  They tend to look like this:


Although they are the best brush out there for the job I have a problem with them: their bristles are far too long to do anything other than a lackluster job.  Yes, they carry a lot of flux from the bottle to your project but that's not what we want to accomplish.  Flux is a mild acid that is used to clean the copper foil so the solder will stick to it.  If you have puddles of flux on your window you're doing it wrong.  Since flux is a cleaner you can help it do it's job better by 'scrubbing' it onto the foil.  This is something that you can't easily do with bristles that are long and floppy so I trim my bristles down to about a quarter of an inch in total length so they are good and firm.  I do this by holding the bristles of a new brush tightly between my thumb and index finger as shown below.


Then just take a pair of sharp scissors and trim the bush along your thumb.  Holding the bristles ensures that you will have a straight even cut which is very important.


When you're finished you'll have a brush with short stubby bristles that won't flop about while you apply your flux.  This will allow you to use less flux and help the cleaner do its work by scrubbing as you go.  Use a back and forth motion with the brush pointing straight up and down rather than at an angle.  If your flux brush looks like the one pictures below then you're ahead of the game.  Remember to wipe off your flux brush each time you dip it in your flux bottle.  Too much flux will make your soldering go slower and cause sputtering, especially on the back side.


OK, so let's start by doing what we always do and look at the completed windows that our students made this week.  I have to give a tip of my hat to Carol whose Rose Window was finished quickly and precisely.  Carol thought that the rose pieces might have fit together a bit too tightly but I beg to differ because I can't find a single thing wrong with this window.


Bonnie's Victorian Angel turned out much better than I thought it would.  The black and white pattern was difficult to see just what was going on but now that we have some color I have to say I love it.  Bonnie was worried that the hair was too light and would blend in with the glass that she used for the flesh, but both she and I were both extremely happy with the finished results.   A little color and a little light make a BIG difference.


Becky S's Steer Window went quickly for her and I guess it's safe to say that she grabbed the Bull by the horns when making this window.  I was of no help at all in this project-- Becky did all the work herself.  And the word 'perfection' comes to mind yet again.


Jane's version of the Iris and Dragonfly Window is complete this week as well.  Three different greens were used making this and Jane went for just subtle differences between the three greens.  Stark, contrasting colors make for a harsh window and by using similar shades of green I feel that Jane hit the nail on the head for this project.  This is fast becoming a very popular pattern-- expect to see another one started next week.


Linda L completed her pair of Clear Textured Boxes and they are so clean and sparkly that I couldn't get a very good picture of them.  The textured sides reflect in the mirrored box bottoms so much that the text on the tops are barely viable.  This is NOT the case when you see the actual boxes. (The flash on the camera didn't help matters).  I have to give Linda a lot of praise for these boxes because she assembled them all on her own.


And that wraps things up with the completed projects this week.  But there's plenty more!  Carol's Saints Window is just about finished.  Her lettering is perfect and only the final border needs to be tacked on before she can begin soldering this piece.  Carol seems to have the art of  symmetry completely mastered.


Look out world because Mary Grace has not one but two projects under way.  She cut out a Flag Lawn Ornament while she was at home and did a great job.  She brought it in hoping that it would get my A-OK before she wrapped it and I told her to take it home and wrap it because it's gorgeous.   Then she resumed work on foiling the pieces for her Fruit Bowl.  I think that by this time next week she'll get some background cut for it.


Linda L's Logo Suncatcher is ready for it's border.  I suggested that she tack the inner section together before grinding the final border because things tend to grow when you wrap them in foil, but since Linda kept pins between everything nothing grew at all.  That means that with just three pieces left to grind and a moderate amount of soldering to do I'll say that this gets completed when Linda comes back.


Cindy completed repairing the Stained Glass Lamp that she began last week and once that was done it was taken out to the car before I remembered to get a picture of it.  Next Cindy began work on her Tri-De-Lis Window.  Although there are only 8 pieces cut and ground I think it's safe to say that it's going to look spectacular when it's finished.  This is one of those windows where you'll get a good feel for its final look AS it's being worked on.  I can't wait to see this window completed because I think its going to be phenomenal!
 

Gale's Memorial Window is...Wow!  She's been working at home on this and she already has it ground now.  There's a small section of red missing in the upper right that she may have left at home but even if we need to re-cut it that next week it will take only two minutes at the most.  I have to say that the rifle and that helmet look so real.  And it's not often you see stars in the blue section of a stained glass flag, but has has them in hers!


Which brings us to Mickey Mouse who I think is looking great.  I love cartoon windows because you can go all out with color and because the subject matter lends itself perfectly to the stained glass medium.  Jeannette's Mickey Window has some real depth because his foot is coming out of the bottom border. It's a simple effect that really gives him some life.  I can't believe how quickly Jeannette is flying through this project since she has less than a weeks worth of work on it.


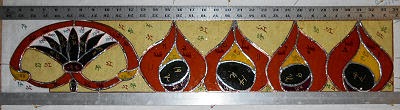
Brenda's been busy with this black and gold Fleur De Lis Window.  She's another student who always seems to have a Fleur De Lis in the works.  Some students have signature windows and I think that Brenda's is the FDL.  But she certainly doesn't limit herself to them, and that's a good thing-- Brenda's diverse.


Linda L worked on her Wild Things Letters which she'll attach to the bottom portion of her Wild Woman Window.  I'm a little concerned about ending up with a lot of lead lines between the text to get everything to fit into the background but I'm sure Linda will make out just fine.  And I must say that the letters themselves look great.


Martha worked on both her Magnolia Window and this Cardinal And Flowers Suncatcher.  All of her background has been ground to fit in her Magnolia and her Cardinal is almost completely cut out.  You might think that the Cardinal has some grinding done on it already but that's just proof that Martha's cutting has come a long way.


And Winnie The Pooh has his border attached.  Jeanne looked high and low at colors and color combinations but red was really the only one that suited this window perfectly.  Jeanne was originally hoping for a yellow border and I thought it would be a good choice as well, until we saw different yellows next to the window-- then we changed out minds pretty quickly. She tried greens, blues, ambers, and browns in all sizes and combinations before finally settling on the only fitting color-- red.  And as you can see it was the best decision.


Then Shelly finished cutting out her latest Bird and Flower window and spent some quality time at the grinder.  With more than half of this project ground I suspect Shelly will be wrapping before you know it!


Ann's Flower window is really filling in now.  She's added two more flowers on the right and left side to fill out a large empty area and will be adding some leaves to make them look like they always belonged there.  Cutting the background for this is getting closer and closer.


Terry's got two projects in the works, a Dueling Football Logo Window and a geometric design.  The latter got it's final border applied and now just needs to be wrapped and soldered.  The Football Logo's Window is already looking magnificent.  Balance is important in a window like this because if one side is a very simplistic and the second side is complex the window will look uneven.  But these work wonderfully together and Terry hasn't shied away from any of the tough cuts in it.


Sue has her two Featherized Windows almost completely assembled now.  There are just a few pieces left to go and then she'll be attaching her border pieces.  These are turning out very nice and I can't wait to see what she decides to use for her border glass.


We've had a lot of rain here lately but Myrt still managed to cut her grass.  And doesn't it look spectacular!  I need to make a mental note that this green makes the best grass possible (maybe I should actually write it down because my mental notes don't last very long).  I guess this means that sky and clouds will be up for cutting next and that's when this window will really look like a backyard scene.


And that's it.  We're late with this post, it's been a bust week and the rain has made our internet connection more than a little spotty.  But nothing stops our updates completely-- we just run a little late here and there.

Paul

Tuesday, April 21, 2015

Brought To You By The Number 9


Most students have trouble with their windows after they've wrap their pieces in copper foil and discover that things no longer fit together as they did before the foil was added.  This is because each piece is a little larger due to the foil.  The thickness of the foil may not seem like much but, like the pages in a book, they will add up to a very measurable difference especially when you realize that there are not one but TWO pieces of foil between every piece of glass.  I like a lot of wiggle room between my pieces but students are always afraid that they're going to have too much space and tend to grind too tightly.  Long ago I used a trick to space out my pieces that we're going to start using throughout of classes.  While grinding we will leave at least two pin between each piece of glass which will leave plenty of room for the copper foil that will be applied later on.  You'll see this being done in Linda F's Logo Window a little later in the blog.

Right now we're going to get our update under way by looking at the three completed windows that we have this week, starting with Brenda who finished work on her Magnolia Window.  Can you say 'perfect'?  Because that's what this is.  The double border matches the Magnolia flowers and branches beautifully.  How can you not love this?


Terry's Egrets and Magnolias Window is stunning, but we've come to expect that from Terry.  Pay attention to the glass she used for the water because it's what really makes this window shine.  The blue glass has green mottled throughout which makes it look like you can see the leaves of the magnolias reflecting in the water.  Gorgeous!


Susan made her second 3D Sunflower Lawn Ornament and she put this one together all on her own.  And as you can see there's not a flaw to be found in it.  It's darned near impossible to screw this project up while assembling the 3d section (unless you possibly drop it) because none of the angles are fixed.  You can always angle something somewhere a little more to make things fit better.


Becky S's Steer Head is just about complete now.  This week she added her border, filled in her missing piece, and soldered the front side after she put the brass channel on her window completely on her own.   I think that it's now official-- from beginning to end Becky no longer needs me to make a stained glass window. :-(


Bonnie's Angel is all cut and ground with one wing and her hair already wrapped.  Bonnie took this home with her so could could finish wrapping it during the week, but even if she doesn't get it completely foiled I have no doubt that this will be completed during her next class.


Gale's Military Tribute Window is almost completely cut out already.  I thought that as a new student this might take a little time for her to work through but the only thing left to cut is the purple heart which shouldn't take long at all.  Her work is impeccable and her color choice is spot on as well!  Wait until you see that helmet lit up.


Ann just has background left to go in her flower window because her flowers, leaves, and stems are all wrapped and tacked.  She's considering adding something to the right and left sides but she isn't quite sure.  Alas, I have an idea....


And Janet's Melon Window has its border and zinc channel attached.  For all intents and purposes it is ready to be soldered.  There's a missing lead line that she really wants to fix but we'll do that at the very end in a way that will probably knock the socks off Janet.  It's a solution that always leaves students saying, "You mean that's all there is to fixing that?"


Linda F is making some major headway on her Logo Window.  Linda is one of MANY students who usually finds that she's ground things too tightly and then has to regrind pieces as she's wrapping her glass so that the project fits back together.  This week she's using  my old pin trick to make sure that there's an equal amount of space between each piece of glass that will allow for the foil without making her project grow.   All of those yellow dots that you see are pin heads and they're about to make Linda's life much easier.


Meanwhile,  Linda L worked on two clear stained glass boxes complete with inscribed beveled lids.  She had made a bottom at home but wasn't happy with the amount of copper foil that was showing through the clear glass.  Once I told her how to help minimize it she decided to start from scratch and just cut out two more.  All she needs to do now is add the mirrored bottoms and then attach the tops.  Look to see these completed in our next update. 


Martha is just about ready for a border with her Round Magnolia Window.  She only needs to grind a few clear background pieces and then she'll get her border attached.  It may be round but it's still easy.  The big question is, will Martha use yellow or green glass for her border?


Mary Grace has her Fruit Bowl all cut out AND ground as well!  She's wasting no time at all on this project and if this gets wrapped quickly enough we'll easily see the six pieces of background glass get cut during her next class.  A double border looks great on this window and I suspect that's where Mary Grace will be leading this window to soon ehough.


And Jeanne's Winnie the Pooh Window is ready for its border.  Once all of her foreground was tacked together she slipped a piece of blue glass under the finished portion of her window and then traced around everything that she'd already wrapped and tacked.  Once the blue glass was marked it was simple to cut out everything and get an almost perfect fit after a quick skim on the grinder.  I can't wait to see what color border Jeanne goes with.


Rowena got all of the upper portion of her Baseball Window all cut and ground while she was in class. She has no problem working the grinder and when she walks away from it her pieces all fit beautifully.   She also managed to get the white background to her letters cut out and will grind them when she comes back in.  Just look at that glove!  This is really turning out nice.


The shrubbery around Myrt's Outhouse Window is just about complete.  The rest will be child's play  because the hard part is officially in the past with this project.  I'm guessing that she'll have the ground completed when she comes back in.


Natalie's Crab Window looks fantastic.  There's a lot of detail in the body but Natalie just set her mind to it and finished grinding it in class.  She started wrapping it and before you know it she'll be cutting the background glass.  The extra work has really paid off with this design as you can already see.


Terry took a Beveled Cluster and  combined it with another pattern that she's seen someone do in class.  The end result is this stunning window that just needs three more borders (just twenty-four straight pieces) before it's complete.  And for the record, Terry has perfected the art of making symmetrical patterns.


Poor Sue carpools to class and accidentally left her background glass in her car when she switched vehicles!  That didn't stop her from being productive though.  She still had enough scrap background glass left in her box of tools that she was able to continue working on all the small fill in pieces.  In the end, no time was wasted and this pair of windows is nearing completion.


Jane had only flower petals when she left last week and this week she has all of her glass cut.  In fact, the only thing left to do is wrap the border, attach it, and then solder the second side.  Octagon borders are a bit tricky but once you see how they are aligned they become very easy to do.


Cindy worked on a lamp repair this week which she'll wrap up during her next class.  This lamp is already stronger than it was when it was originally purchased and the repair work has shown Cindy why lamps can be purchased so cheaply at discount stores--- They aren't made correctly!  Not one of the pieces that Cindy removed was ground which explains why this lamp was so flimsy.


Somehow, even though I walked out to the car with Carol, I managed to forget to take a picture of her latest window.  The Fleur De Lis is all tacked together and the background has been cut out of a wispy white glass.  She'll be working on cutting out the 'SAINTS' text that will rest under this Fleur De Lis next.


And that, as they say, is that!

Paul
Bayou Salé GlassWorks

Monday, April 13, 2015

Dean Has Them At The Convenience Store

Our tip this week is quick and simple.  Never wash the flux off of your project until you are completely (100%) finished soldering and touching up your window.  Once you take that flux off you're committed to the soldering job you see in front of you.  Refluxing won't make things any better, in fact, most times it makes things worse.  Just remember that when the flux is gone the patina goes on.  Learn it, live it.  :-)


So, as I had suspected, Jeannette completed her Crab Window this week.  She even went the extra mile and added a little wire work around the eyes to make this as authentic looking as it could be.  And it's exactly as I expected it to be-- gorgeous.


Gale completed her Louisiana Fleur De Lis Window and it looks so good.... (How good does it look?) It looks so good that the pattern has already been claimed by Carol where it may then go to one of the Wednesday students.   Gale did a great job with this window and I believe that a double border FDL would already be child's play for her to make. 


Linda F Completed her frog window and I'll bet this is going to look great in her yard.  It may be a small window but the attention to detail that Linda put into it pays off richly.  Everything lines up perfectly and this window is a great example of how far Linda has come since she first started.


Betty also completed her clear stylized Fleur De Lis and for the first time ever a clear window has photographed beautifully.  Just look at all the textures she used to make this truly elegant window.  With colors replaced by textures, this window has a completely new look.  (And it's good!)


Shelley completed her Mermaid with a Pirate's Treasure Chest and she's the catch of the day.  Shelley says, "No more stained glass Mermaids!" but I think that will only last a little while because Mermaids certainly seem to be Shelley's muse.  Next up she'll be working on her flower window, after that maybe a Merman?


Jeannette  also finished her Anchor Suncatcher which is actually a mashup of three different anchors that I found on the internet that I liked different parts of.  There's nothing looking taking ideas from here and there and assembling them into one GREAT looking suncatcher.  But it wouldn't be great if the craftsmanship were weak and that's something that Jeannette has nothing to worry about.  Anchor's aweigh!


Betty completed her 3D Bumble Bee and was amazed at how just a few small curves can make such a big effect on this bee.  Seeing it all laid out on the pattern was one thing, but seeing the bee with all of its curves after it's assembled is another thing entirely.  I just wish they carried over the the pictures of these bees.


Janet now has all of the background glass for her Melon Window cut out.  And even better yet, most of it is ground.  I think there were only four pieces left to grind so there's a good chance we'll be cutting a nice yellow border for this when Janet comes back in.


Ann has all of her flowers cut and ground and has begun wrapping them so she can tack them together and reduce the amount of pins holding things together (and also help minimize any piece slippage)  With the flowers all wrapped Ann will start grinding the stems and leaves when she comes back in.  She may have to tack these first but that shouldn't take more than 10 minutes.


Betty started a new window this week and it's halfway cut out and looking great already.  She found this flowing geometric design online and although it's an easy window to cut out, the grinding and piece placement is crucial in making the design flow.  If just one piece is a hair more than a 1/6th of an inch the flow will break and the effect will be gone.  But I know Betty can easily handle this window (even with her eyes closed).


Carol came in with her new rose window all cut ground and wrapped.  In fact, the only thing left to do was to cut a border for it.  Once she picked a color it only took a simple 5 passes through the strip cutter and her border was ready to be ground, wrapped and then tacked into place.  I think that Carol turned this complex rose window into a not so complex two week project.  Nothing can stand in Carol's way now!


Becky S's steer is completely ground but there was one casualty.  One of the small upper corner pieces slipped and hit the grinding wheel scuffing it so much that it was readily apparent even in the small 1/4 inch piece.  So Becky will be replacing that when she tacks this together and adds her border.  Problem solved.


Gale not only completed her Fleur De Lis window but also began work on this Soldiers Window featuring and American flag background, a rifle, a helmet, and a Purple Heart.  I do believe that this is going to be another standout window in gale's stained glass crown.


Jane loved this Octagon Iris Window and began cutting out purple water glass iris petals this week.  She ground them all to fit and then then took it home with her so she could resume working on it there.  I can't help but wonder how much will be completed when she returns to class next week.


Natalie made some astounding progress on her Crab Window this week by not only cutting out the remaining crab pieces, but by also getting more than half of the crab ground as well.   I'm  amazed at how easy Natalie is making this project look.  Once the crab is completed she'll wrap the pieces and then tack it together to make fitting the background a lot easier..


Rowena's baseball window is not really coming together... It IS together!  The only thing left to cut out is the bat and the background to the letters.  I think that Rowena is going to be very proud of this when it's completed and I doubt that will be long from now.  She can really focus on the task at hand.


Linda F is making an interesting window which is, in all actuality, a CF Knives Logo.   But for all intents and purposes it's a Celtic Knot so that's what we're going to call it.   It's only nine inches in diameter so the pieces making this complex design are kind of small, but Linda has proven time and again that she's up to the task.  This sucker is almost completely cut out already.


Sue's  first section of her Featherized Window is just about complete which puts her almost at the halfway point of this project.  I was impressed at how quickly she plowed through the background pieces and can't see how that will change when she starts cutting out the background to the second section of this project.  Before you know it Sue will be picking our a new design to work on.


And lastly we have Susan who worked on her second Sunflower Lawn Ornament.   As you can see, it's just about ready for wrapping,   The best part about a student making two of these 3D projects is when they assemble the second one on their own.  I'll be there to offer reassurance but I know that like so many other students who have made these, Susan will be very thrilled when she sees how easily this complex looking project goes together. 


And that brings us completely up to date!

Paul
Bayou Salé GlassWorks