The biggest problem with a panel lamp is that the angles on every side of each panel must match exactly or they won't line up when they join together. When you are grinding your glass for a panel lamp you MUST use a jig to ensure that each panel is identical or they just won't line up in the end. If you are off just 1/8th of an inch on each panel that 1/8th of an inch keeps growing with each panel you add. That 1/8th of an inch comes out to 3/4 of an inch if you are making a 6 panel lamp!
To make a jig just trace out the lamp pattern with a piece of carbon paper onto a flat piece of wood and then nail strips of wood (we used a cut up yard stick in the picture below) along the top and side edges of the lamp. If you grind and assemble your lamp in this jig and push all of your pieces out to the sides you will end up with identical panels that will fit together perfectly when you solder them together. We'll be seeing Janet make this lamp throughout the next few weeks so keep reading week to week to see just how this jig is used.
Also, make sure that your edges don't hang lower than your pattern (indicated by the red arrows) or the two edges still won't align properly.

Doesn't Betty's Ribbon De Lis Window look great? The subtle difference between the pink border and the pink Fleur De Lis works nicely as does the double border. All of Betty's lines connect even when they are broken apart by background glass which is the 'make or break' section of this design. Betty understands that the pattern was drawn to be followed, not used as a rough guideline. And that is exactly why this window is so beautiful.

Linda L made these two Lawn Ornaments this past week and she came in with them just needing to have stakes added to their backs. Beautiful cutting and nice, smooth curves make both her Parrot and her Cat easily identifiable.

Carol's Stylized Fleur De Lis was essentially made at home but what a job Carol did on this window. It's a very popular design and as you can see, Carol has it fitted and leaded together beautifully.

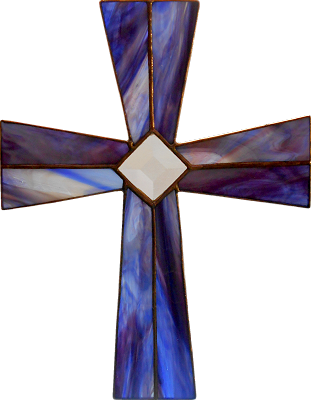
Rowena was busy as can be also. She has another Cross completed along with two medium sized Butterfly Lawn Ornaments. Gorgeous work all around but that's always the case with Rowena's projects.

Ann's newest window features her popular blue/green cross and all it needs now is to be soldered together. Ann has a lot of the top side completed so there's a chance that this may be finished when she returns to class next week.

This clearly elegant Fleur De Lis window was started by Betty while she was at home. She went through all of her clear textured glass until she came up with this combination of clears. She's picked out a background glass and will get that cut out when she returns next week.

Becky B's Horse Shoe Cross is all wrapped and ready to be tacked together. Once that is accomplished Becky will fill in the center section with a design that will differ from what has been drawn on the actual pattern and then begin soldering this piece!

Here's another look at our lamp jig that we discussed at the beginning of this post. Here you can see that Janet has the pieces of one of the panels all in place and ready to be ground. Janet will assemble six of these panels and when they are all joined together she'll have a complete lamp. All of her glass is cut out so let the grinding begin!

Charlie is through with hand mirrors and back to work on his pair of Birds Of Paradise Windows. This is actually the second window that he has completely ground which means that he's going to be wrapping for a week or two so he can then tack these together and get to his double borders.

Cindy's got two projects under way and both are looking very good. Although I love her Alabama Panel it's her Harley Davidson Window that really impresses me. We had to square it off and put it in a frame due to the straight lines that run through the window but it's nice and sturdy now. Expect to see this one completed in our next update.

Just when I had a name made up for this window (Les Lignes Courbes) Brenda tells me that it's a symbol for eating disorders. I like calling it a Les Lignes Courbes Window better. Either way it's a nice curvy design that depends on the black sections being cut gracefully for it to succeed. And it looks to me as though Brenda is succeeding with it!

Sue is making this colorful Mardi Gras Jester and it's frilly neck pieces have been cut usingVan Gough glass (mirrored, colored glue chip). The effect is striking and I can't wait to see how this looks when Sue completes it.

It's been a while but we have another student starting a Peacock Window. I love making these and everyone that has made one in the past has loved making theirs as well so I know that Jeannette will have a great time working on hers. She'll be assembling this in stages starting with the teardrop peacock feathers. You can see that she has most of them cut out and when she comes back in she'll begin filling them in. Watching this window being created will be fun to do over the next few weeks and I know that Jeannette will certainly do a great job.


With the sky backgrounds all cut out for her two Duck Windows Martha is nearing completion on this pair of windows. One is already ground and wrapped while the second is more than halfway ground. Next week we'll be adding borders to these. Since Martha used one piece of glass for the sky of each window the pattern in the glass runs smoothly and flawlessly through the pieces. This detail is what makes this window look so good.


Myrt's Cat In A Window Window has all of its glass cut out now. Even her border has been cut into strips which means that Myrt will have all of her glass attached when she comes back in. This cat is nearly out the window door!

Next we take a look at Mary Graces latest Straight Cut Window. She may love her pistol grip but she's dealing with the soldering iron now. The front is completely soldered and the back side is ready to go. I wonder what Mary Grace will be starting next week.


Who is making this Butterfly Lawn Ornament? You're guess is as good as mine. Judging from where the picture was taken and by the tape that surrounds the board it's being assembled on I'm guessing that it belongs to Linda F but I can never be 100% sure. If I've misidentified this project please forgive me! That said, whoever is making it is doing a great job as you can see by how everything is lined up.

Now don't get all excited-- this is only a picture of a picture of the window that Terry will be making for her daughter. It's not the actual window yet but in a few weeks it will be! I can't wait to see this one completed but I have to tell you that it's HUGE! It just about fills one of our work tables so transporting and moving this beast could become an issue.

And this is a picture of a picture of Bonnie's next design. She has it all drawn out (she did it herself) and she even has bevels wrapped for it but I was a little too late with my camera so all I have to show you is the little black and white imagine that inspired Bonnie to work on this project.

And lastly, I didn't get a picture of Becky S's new project so I'll just show you this picture of her pattern instead. We still don't have all the colors picked out but Becky will begin cutting this next week. She's looking forward to using copper foil sheets in this project so expect something a little different.

Like a piece of glass after it's been foiled, that about wraps things up here!
Paul
Bayou Salé GlassWorks
No comments:
Post a Comment