Finally we get to the Running Pliers Adjustment Lesson that I've been talking about for about a month now. People think that setting your pliers is akin to rocket science but it isn't at all. First, the reason we have an adjustment screw is to prevent too much pressure from forcing the break to jump off of the score line. Can we correctly break glass without setting your pliers? Most of the time the answer is yes but while you are making a complex cut you should ALWAYS adjust your pliers to the glass you are cutting. Here's how to do that in 4 simple steps:
First of all, the picture of the pliers below do not show a piece of glass in them. The glare from the flash was obscuring the view of the pliers so I removed the glass while taking the pictures below. YOUR GLASS SHOULD BE IN YOUR PLIERS WHILE YOU ARE ADJUSTING YOUR SET SCREW!
1) First, locate your set screw. The green arrow is pointing to it in image #1.
2) Twist the set screw counterclockwise about a quarter of a turn so that the pliers jaws no longer squeeze against your glass.
3) Lightly twist the set screw clockwise until it stops turning. Use a light touch-- do not force the set screw to close any further once you feel it stop.
4) Lastly, turn the set screw counter clockwise just the smallest amount. Picture the numbers on a clock and turn the set screw from the 12 position to the 11position. That's it!
Waterglass and textured glasses are notorious for being different thicknesses throughout the sheet so adjust your pliers for each tricky cut that you make by placing your pliers on the score line as you set them. That's all there is to it. I can set a pair of pliers in a second or less-- no lie. This little tip will inevitably help you get your complex cuts out quickly, efficiently, and in one piece!
First up in our completed projects we look at Shelley's Sunburst patter. She really wanted to do something less simplistic than this pattern but I have to say that the end result of this minimalist window is nothing short of striking. Perhaps it's the fact that she used all Cathedral Glass which makes it light up spectacularly, or perhaps it's just Shelley's workmanship-- nonetheless it's sensational and it's earned the top spot in our completed windows of the week.
With Christmas of 2021 being 90 days away Rowena decided that she'd best get on her sleigh and get some Christmas projects started. It turns out she did better than that though because she whipped this Santa Face Window out in just two short weeks. The best news is that this is ready in time for Christmas even though Christmas is less than 60 days away. Where, oh where did this year go to?.
Mary Grace finished her Flag/Heart Hoop and does it ever look great. Pay attention to the grain of the clear glass that Mary Grace used for the star. The grain radiates outward from the center of the star to the end points of each arm of the star. The effect is much more dramatic than if she had cut it all going in one single direction. This is a great example of the grain of your glass having a noticeable effect on your finished piece.
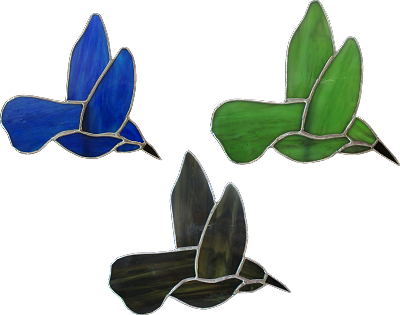
Linda L found 3 Bird Lawn Ornaments that she had cut out last year and forgotten about. This week she hauled them out of their hiding spot, wrapped and soldered them and then took them home to decorate a few flower pots scattered throughout her yard. It's always nice to stumble across an old project you'd started but never completed because it gives you a head start on getting something accomplished quickly.
Helen is on a Cross making roll as she belted out two different styled Cross Suncatchers of two different sizes. You can see that she likes mixing clear glass with bevels and even though one of these has 5 bevels and the other only one, well I can't pick a favorite because they're both equally wonderful.
I have to say that I love Sheri's Peace Sign Hands. I know she's made at least one of them before but I didn't get to see it. Now that she's working on three more I finally get to see just how nice these are. Do you know the simple way to cut out three items with three assorted mixed colors? Just cut out one complete red hand, one complete white hand, and then one complete blue hand. Juggle the pieces around and you end up with what Sheri has cut out below.

Cindy is waiting for glass to border her Pelican Window so at the end of the night she began work on another Cross pattern. She's already got all of the purple glass cut out for it so I'm thinking this will be completed before her Pelican Window which we'll see a little later on in this post.

Susan's Spring Panel is ready to be sprung now that she's got it all foiled and ready for solder. I know she isn't going to wait until next week to begin soldering it so I'm anxious to see what she'll walk in the door with when she returns. I have to give her a lot of credit for accomplishing all of her work on this entirely on her own as well as being VERY, VERY quick yet painstakingly precise.

Cheryl is well on her way to finishing her Scales Of Justice Window. She's got the lions share of the grinding completed so she'll easily begin wrapping all of her pieces when she comes back in. And speaking of wrapping her pieces, the two pans have been cut out of the same glass as her background so they're hard to see right now but Cheryl will end up covering these two pieces in sheet foil and then cover them over with lead adding an extra bit or artistic flair to her finished window.
With yet another Stylized Sunflower Lawn Ornament all cut and ground Susan R is ready to begin soldering these two decorations and get them ready for yard duty! I'm anxious to see these completed because I think they're going to look marvelous. I'll prove that when we next return.
Linda L had some extra time since her three Lawn Ornament Birds had already been cut out so she also worked on this Cardinal Suncatcher as well. As you can see, this bird's almost finished just one week into it's creation!
Next up is Cindy's Pelican Window that we talked about earlier. Cindy had a very busy class because she managed to get all of her water and sky cut, ground, wrapped and tacked together. All she needs now is the beak, the rope, and the border which will all be cut from the same piece of glass that she doesn't have yet. And that's why she then moved along to her Cross Suncatcher near the end of the night. Hopefully she'll have the glass that she needs to finish this Pelican when she comes back in.
After contemplating numerous sheets of glass Judy decided to use a medium purple for her thin inner border and then use a different textured clear glass for her final border. It's all been cut, ground, and foiled so once that final border gets tacked onto the window Judy will begin soldering her Wine Ladies.
When Kerry walked in the door he set to work wrapping all of the pieces to his Stylized Fleur De Lis Window. Once that was done he tacked it together and then cut out a border for the window. By the time everything was tacked together there were only ten minutes left of class so Kerry decided to call it a night and begin soldering this when he comes back in next week. This window is almost a done deal already.
Lastly we look at the small Louisiana Iris Window that Barbara H resumed work on. Like Kerry's window above, this is all tacked together and ready to be soldered. I'm certain that will happen when Barbara comes back in and I'm also certain that this will be finished because believe it or not, this 'window' is only 6 inches wide and tall! Yep, those are some small pieces there.
So there you have it. A small set of classes that still provided us with a good amount of completed projects. And we'll see even more in our next post when we hopefully see you all again.
Paul


No comments:
Post a Comment