Monday, September 26, 2016

I Troad It Away


I wish I could take credit for our tip this week but Linda F found it somewhere on the internet and shared it with me a few weeks ago.  Here's a great way to store and dispense your foil with something that almost everyone has hanging around their house.

Start with a simple CD case.  Open it, remove the CD, and then place your fingers along the edge of the case where the red arrows indicate and lift upward.  The dark plastic section that normally holds the CD in place will come up and out of the case.  You can discard that section as well as the CD cover which will slide easily out of the left side of the case.

 You should now have an empty case that looks like this:

Next you're going to cut a small notch into the bottom right corner of the back side (where the dark plastic insert was) of the CD case.  A hacksaw works great for this but in a pinch a hot soldering iron will melt the plastic (as well as fill your room with a horrid smell).   If you use your iron be sure to wipe the tip clean before you unplug it. 

 Once the first notch is made, close your case and mark where the hole lies on the front side of the case with a fine point permanent marker.   Open the case and cut out the section you've marked on the front of the lid the same way you did the first notch.  You want an opening that goes completely through the case when it is closed.

Now just place your foil in the CD case with the foil coming up over the top of the roll and down out the bottom notch that you've cut into the case (as pictured).  I've found that a full roll of foil won't fit in a standard clear plastic case but it WILL fit into the flexible black plastic cases.  Also, if the foil jams just place the roll of foil on top of some waxed paper and cut out two circles, one for each side of the foil.   This is a great way to keep you foil from unraveling and coming out smoothly!


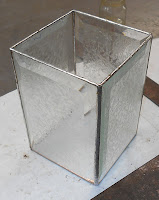
So then, let's start things off by looking at Carol's latest Panel Lamp which is another amazing piece of work.  She's made three of these (panel lamps) and I can honestly say that I've never seen the final pieces of a lamp line up as perfectly as these did.  Carol took her time and went the extra mile when things weren't fitting together as she'd hoped they would by leaving out pieces and replacing them after the rest of the panel was tacked together.  If you want to know what a perfect lamp looks like just look at the picture below..


Susan R came in and finished up all the work on her first stained glass box which includes a box bottom with two compartments.  She did a wonderful job on this and designed it all by herself.  you can get a look at the double compartment in the second picture where the box is opened.


Ann's Fleur De Lis Window may be a standard pattern but she's enlarged it considerably.   She's also avoided a standard Stained Glass pitfall by adding borders to help enlarge the window rather than just making everything bigger which can make a window look oversized and clunky.  As you can see that's certainly not the case with this window.


Susan D got even more leaves soldered for her Flower Cornucopia Window and before she left she laid out one section of the project so we could get a feel for the finished product.  Just laying there on the table I must say that it looks INCREDIBLE!   She's got more than enough subject matter to make this a nice sturdy window but just to be sure it doesn't all come apart at the seams she will be tacking this to a wire framework that will be hidden behind all of the glass.  You can never be too safe!  I just love this project.


Terry has the front side of her Humming Bird Window all soldered and then flipped it over to work on the back side.   There are only a handful of solder lines to go before this is completed and she starts working on her next project which might be a pair of cardinals.


Tasha made GREAT progress on her 3D Mirror this week and got all of her glass cut out.  Once these three sections are ground she'll solder them and then make the oval mirror that these will attach to.  What I love mist about this project is that you can't tell what it will be when it's completed.  But when it IS completed I can guarantee that you'll be impressed.


Barbara has begun working on Candle Holders and Boxes for Christmas.   She's certainly not starting too early (is it EVER too early to start something?) because Christmas, like it or not, is right around the corner.  During her first class of work on these projects she's already almost completed her first Candle Holder.  In fact, it would have been completed but she wants to add brass feet which will be done within the first 20 minutes of her next class.  She's taken bevels home to wrap so she's truly moving right along.


Mary Grace is already soldering her Welcome Window.  We've decided to not add the channel around the outer edge until after she's completed the soldering because flux has a way of reacting badly with zinc channel if you aren't careful.  And it's not that Mary Grace isn't careful, it's just more a case of 'why tempt fate'.  I've seen too many zinc channels get pitted due to spilled flux and prefer to add zinc channel at the very end of the project nowadays.


Jan came in and got the remaining pieces of the first panel in her two Bookcase Windows all cut out and ground.  There was a slight incident when a book hit the floor but she replaced it with the same glass and no one would ever suspect that there was an issue if I hadn't opened my big mouth and blurted it out for everyone to read about.  Jan is wrapping her glass even as  I type this so it will be ready to be tacked together soon enough.


Roxanne gets an A+ for her cutting abilities on this Duck Window that she's making.  Just look at  how wonderfully this is fitting together without it even being ground yet!   This kind of fitting proves that there's a HUGE benefit to cutting off the patterns lines as you cut your glass.  The grinding on this window is going to go quickly and easily for Roxane.


Sheri's already at the tail end of work on her Flowers and Fleur De Lis Window.  In the end she decided to cut the FDL out of waterglass which is a wonderful bevel substitute.  When the size of a pattern is altered any bevels inside the window will have to be replaced by either cutting them out of glass or by replacing the bevel with something that fits into the new size.  Bevels may be beautiful but they are VERY unforgiving when it comes to size changes.


Cindy started this small Cardinal Window and already only has the background and the flower petals left to cut out.  She's a quick worker and I won't be surprised to find her about this far along on yet another project when we next see her.


Now that her background glass has arrived, Brenda is back at work on her Beveled Transom Window.  This week she got all of her bevels wrapped and tacked together.  Then she began cutting her background glass which  you can see in the inset closeup of her left side of the window.  There's not a lot of background to cut so she should make great time on this window BUT you do have to grind wrap and tack together the sections as you cut them or you risk throwing the window out of square.  And on a window this long... well, that just wouldn't be pretty at all so Brenda will be taking her time and doing it right the first time.


This week Bonnie's Skull window is officially all cut out (save for the border) and she's begun grinding everything for a perfect fit.  It's a little hard to see what this will look like at this point in time but trust me when I say that it's going to be a real head turner.  We should be able to make out exactly what the skull looks like when we next see this window.


This week Rowena has made INCREDIBLE progress with her Peacock Window.  It's huge and there are only  four more pieces of background left to cut out and tack together before she adds her borders.  She's doing something a little different with her inner border by disguising the cuts in its length with little accent flourishes that add so much to the finished window.  And you'll see exactly how that looks when she comes back next week.


Linda L worked on cutting the bevels that fit in between the arms of her FDL  this week and by the time she left class she had the biggest section filled in and fitting together perfectly.  She learned how to wrap the cut bevels evenly and did a great job cutting and wrapping them.  In fact, Linda only has 7 more bevels to cut and then there's just the final three borders before she can start soldering this project.  Just wait until you see what she does with the Zinc Channel that will be the final border that surrounds this.


Lara's gotten all the solder on her Mermaid Window and she is just touching things up now so they look their best before she washes and colors this.  Look to see this window completed next week and also expect to see the pattern for the next project that Lara will be working on.


Lynn M came in and completed wrapping all of the pieces in her window and then got her final channel attached.   Once that was done she began soldering where she completed the entire front side.   If she did all of that in just one class I have no doubt that she'll be able to get the second side soldered when she returns next week.  I'd say that the next time we see this it will be in the finished spotlight!


Linda F resumed work on her LSU Window and even went the extra mile by adding a second purple border to the window (which really made a huge change in the look of it).  She's got her channel attached so she'll be soldering this when she comes back into class.  With nothing but straight lines in this window I wouldn't be surprised to see it completed when she returns.


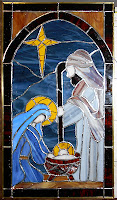
Betty has all of her glass tacked together on her (wrong) Nativity Scene Window which means that she'll most likely have this soldered when she comes back in.  That could be a while though because she'll be away for two weeks and then we're going to miss a week of classes as well.   But this will be completed when we see it again, mark my words.


This week Martha was a soldering fool who got the entire front side of her Seafood Window soldered.  That just leaves one more side to go and then she'll be finished with this beastly window.  It was a lot of work but it really looks great.  Why is that?  It's because any extra work you put into a window always pays off in dividends in the end.


And in the end, Becky S has begun working on this beautiful Flower Vase design and she's just starting to cut out her glass.  This is a beautiful pattern and I know that Becky will make this appear even better than the pattern suggests that it will look.


There's so much getting done in the shop and we're starting to wind down on Church Windows  as well.  Look for a post to see how St. Jules is progressing within the next few days!

Paul
Bayou Salé GlassWorks

Monday, September 19, 2016

If It Bleeds We Can Kill It

Putting All Your Eggs In One Basket

I was going to post a tip showing a wonderful way to store and dispense your copper foil but we had not one, not two but THREE(!) incidents this week of students not bringing items that they needed to class.   When you're working on a window it's always smart to bring everything with you INCLUDING pattern pieces that you've already cut, glass that you've already used, and glass that you don't think you'll need during class this week.  This is becoming an all too popular trend and it's not a good one.  Bring everything.  If you don't need it there's no harm and no foul.  When you have to stop working on your project because you knowingly left something behind at home, well,  it hurts.

I guess we'll show you the Copper Foil tip next week.

Well now, if I do say so myself, Cindy's Candy Skull is exquisite!  I really like this and think that it's just novel enough to turn a lot of heads.  And although there's a bit of a scare factor involved it's more striking than spooky.   This week you can see how its teeth turned out.  Believe it or not, they are all one piece of glass covered in foil.   Cindy then took an Exacto knife and removed the foil where the teeth go revealing the glass beneath.  All of the black that you see around the teeth is solder covering the foil.  I love it!


Becky S completed her Magnolia Window and like everything else she makes, it's flawless.  Becky even attached the brass channel herself and learned that if you use your solder sparingly on the brass you end up with a smoother, more polished effect.  She even altered her pattern as she ground this window and it still fit together perfectly.   This shows what attention to detail gives back in the long run.


Betty had a project that needed to be made quickly during this class.  She needed a pattern for the letter 'R' and she needed to complete it before leaving so it could be delivered later that day when the recipient would be moving out of state.  The full story goes something like this:   A little boy she knows was in her shop and liked a small sheet of glass.  He asked if he could have it so he could give it to his grandfather (who he will be moving away from).   Betty allowed him to take it but decided that she'd quickly make a window with his initial in it so he could give his grandfather something more meaningful than a piece of scrap glass. And now you know the rest of the story. 


Barbara wanted to make a beveled box and this was what she ended up walking out the door with.  Started and finished in just one night, this box is a perfect example of elegance and beauty.  Barbara plans on making more...  


Linda L competed her Pumpkin window and it turned out perfectly which is something that   I never had a doubt about.  This window is a good example piece for a point I'm going to make now.  Whether you are using a different piece of glass for the border or the same glass that your background is cut from (as in this case), you never cut the border until the center section is tacked together.  if you cut your border along with the rest of your window I can guarantee that it will be cock-eyed.  Borders should always be cut with either a pistol grip cutter, or better yet, a strip cutter


As promised, here's the Boat Window that Chad drew up and then made with Shelley.  He's done a wonderful job figuring out how to position the lead lines and the overall work is wonderful.  I'm glad I got a good picture of this.


Jeannette made this Flower Hand Mirror while at home and wow, has her work become awesome or what?  Look how beautifully her flower pieces fit together and how the flow of the piece is graceful throughout without any sharp points along the curves, or any flat sections.  This is what you call quality work.


Terry has her Humming Bird Window not only all cut out but ground as well.  She spent most of the night at the grinder and by cutting all of her pieces at once (including her background) she was able to make a window that fits together perfectly.  She'll be wrapping and tacking this before you know it.


Jeannette started this fish window and got both of her fish cut and ground while in class.  Once these are tacked together she'll cut the background out of one piece of glass.  When the background makes up the majority of the window this is the best approach.


Roxane was back this week and wow did she get far along on her new Duck Window.  This is  a large one as compared to Brenda's Duck Window but you might have guessed that from the number of feathers in this.  Roxane will  start cutting all of those feathers when she comes back in.


Carol has made major progress on her latest Panel Lamp and will solder it all together when she comes back in.  Since she can do a finishing solder bead on all eight sides before they're attached together there's even a good chance that this will be completed next week! 


Meanwhile, Linda F has begun working on an LSU Window and with just one week into it she pretty much has it all put together.  With everything cut and all but one piece ground I'd say that Linda has her act together!


Lynn M came in and finished wrapping the center tulip section of her window and then got it tacked together.  She picked a border color that compliments the window perfectly and then got that cut out as well.  She's taken the pieces home with her and will certainly get them attached when she comes back in whether she brings them back in skimmed and wrapped or not.


Jan came it, assembled the pieces that she had cut for her Cat In The Hat Bookcase Window and then cut out her various colored books.  By the time the night was over she was ready to grind.  This is another window with almost all straight cuts so attention to detail is VERY important.  But I know Jan can handle it because her first window was made entirely of straight cuts. 


Brenda went back to working on her Duck Window because the background glass she had picked for her Beveled Transom hadn't been shipped yet.  She got a lot completed on this one though and she's done beautifully with the small pieces.   The good news is that her background glass has arrived so she's going to be working on her Transom when she returns to class.


Shelley continued working on her Autism Rose Window and now has the majority of it ground.  There's no doubt that this will get its border attached when she comes back in and I must say that I love the puzzle piece vase.  The beauty of this window is that if you just slim down the vase and make it one color it becomes a standard rose design that anyone can hang anywhere.


Martha has her borders all cut for her Seafood Window and will start soldering this shortly.  The lead lines are all fairly short so soldering this should go nice and easy.  After weeks of sweating this window out it must be a relief to see it tacked together now and although I wasn't sure about the outer red border I must say that it was EXACTLY what this window needed.


Jeanne has been busy wrapping her solid lead pieces. Slowly but surely this is turning out to be a masterpiece.  When this is completed it will certainly turn a lot of heads and with each week that passes more of the character of this window comes through.


Paula has decided to make all of her box tops before adding the bottoms to them.   I like handling it this way because once she starts working on those box bottoms she'll get on a roll and be able to knock them out more efficiently.  She's also got the patterns for her next two boxes so expect to see a Ballerina and a Sea Turtle soon.


Up next is Myrt who got all of her Mermaid Window ground and then began wrapping it.  I'd like to say that she'll have it tacked together next week but she won't be in class because of 'other commitments'.  Let's just leave it at that... (What?  Me jealous?)


Rowena now has the top section of her Peacock all cut and ground!   We're going to go against the grain and cut the background glass after this is all tacked together-- mostly because the window is so large I want to be sure that it ends up being square (as in having each corner being a perfect right angle).   Once those background pieces are cut and attached it will be all about borders!   Also not that the bottom feathers of the peacock have been removed to make working on this easier.


Lara now has all of her Mermaid window cut, ground and tacked together.  A brass channel was attached and then Lara began soldering the front side.   By the time class was over she had the front almost completed and she's taken this home with her to possible solder the back side during the week before her next class.  This is just about finished and it looks GREAT!


Susan R resumed work on her stained glass box and learned the importance of starting and stopping your foil where another piece of glass will bump up against it.  This is very important on 3D projects because the solder will cause the foil to separate from the glass leaving you with a mess.  Don't worry though because Susan's box will be anything but a mess!  This is looking great and she'll finish it next week with a bottom that has two separate compartments.


Linda L has most of her Fleur De Lis Window cut out as well as ground and wrapped.  She's doing excellent work on it and next week she'll get into bevel cutting which sounds scary but actually isn't at all.  It's just a case of coming close and then grinding to perfection.  that said, it the wrapping of the cut bevels that is actually the hardest part and even that isn't bad once you know the secret.  This window is easily going to look every bit as good as mine did.  It's all about attention to detail and Linda has it.


Cindy may have finished her Candy Skull window this week but she also got a lot of work completed on this Fleur De Lis Football as well.  She certainly wastes no time.


Susan D has another couple dozen leaves completed for her Flower Project and even I was shocked at how many pieces she's carrying along with her to solder.  She said that the completed piece most likely won't fit in her car so you know this is one MONSTER project!


Okay, so I made a major Faux Pas this week and let three(!) people (all who work on the same table) get out of class before I could snap pictures of their windows. Bonnie had started a Skull Window (it seems to be a theme here now) that looks as though it will be every bit as spectacular as Cindy's Candy Skull.

Then there's Mary Grace who decided to go with two borders on her Welcome Window.  After much searching and agonizing she decided on an orange outer border with a thin inner yellow border.  Mary Grace should be proud of her work because this window is about ready to be soldered!

And lastly, Sheri also got out of class before I could take a picture of her work but she's moving right along on her FDL and Flowers Window.  There's really only the FDL left to cut and grind before she can start tacking it all together.  It's moving along quickly and her work is top notch so expect to see what she decides to do to fill in the center diamond section next week

Paul
Bayou Salé GlassWorks