Monday, December 18, 2017

The Paulitics Of Stained Glass

As I've been putting things together this week I've come to the realization that the grinding process is the most important skill to learn when it comes to making stained glass.   To make your grinding go smoothly you need to take your time while you are cutting.   If you take extra time during the cutting process you will discover that the grinding process goes far more easier.   When you rush through cutting you pieces you will invariably find yourself spending more time at the grinder.  Learning how to grind the line off in one pass is a VERY important skill that needs to be mastered if you want your glass work to look good.  Traveling back and forth, left and right, to grind up to the line is never a good idea.   The water washes your line away and you have to dry and re-mark your pieces constantly.  When grinding, you should move slowly in one direction while keeping the glass against the grinding wheel until the line is gone.  One pass on each side of the glass and you'll have it made!


Okay, here it is!  Beth's Dragonfly Window is really spectacular in every way.   As I mentioned last week her soldering was great and  she's already picking up on all the little tricks to make soldering go easier.  I'm not sure what's next for Beth but I have no doubt that it will be another wonderful work of art.  (This just in-- it will be a classic stained glass deign.)


Becky's large round Geometric Window was completed this week and to finish it off she went the extra mile and added some solder texture to the 1/2 inch zinc channel that surrounds her work of art.  As I always say, any extra work you do will lend itself to the overall attractiveness of the window and this is no exception.


As promised, here you can see a closeup of the center of Becky's Window complete with wire accent pieces to help give the solid lead sections an extra bit of flair.


Susan R finished her Christmas Present Light Display this week and although we didn't have any Christmas lights to put in it for its picture, we were able to light it up somewhat with  three smart phones inside of it with their flashlights on and some colored globs over the lights.   It gives a rough idea for how this will look with a full strand of lights balled up inside this beautiful 'box'.


Linda completed her Quilt Square Panel and it's a keeper.   I've always liked these mid size windows that are bigger than a suncatcher but smaller than a window.   They fit anywhere and as you can see they look great.


Betty finished her Mother Mary Window and wanted to know if she should leave it silver or color it copper.  I said, "Let it be, let it be, let it be, ohh, let it be, Speaking words of wisdom, Let it be."  But she colored it copper anyway.   And I'm just kidding anyway-- I would have colored this beautiful window copper as well. 


Barbara H finished her Madonna And Child Panel and like the others before it she's done a splendid job with it. We now have people making these in Suncatcher form as you will see in a minute if you just scroll down one more item. 


Here's Betty's rendition of the same Madonna and Child window sans the background glass and border.  These are lovely yet easy gifts when made this way and Betty will be good for a second one which you'll see later on.


Ann finished her newest Large Amber Cross suncatcher only to discover a piece that was cracked when she finished soldering it.  Luckily it was a simple repair and as you can't see it, no one will ever know that there was a 'problem'.  


Melissa has finished all of her Crosses in plenty of time for Christmas.  These final two bring her total to nine which she got better and better with as each one was completed.   She's ready to start a new project and yet again, we'll look at that a little further on down in this post.


Jan started working on a plate window which involves an actual plate being used as a center piece to the design.   She's going to skim its edges on the grinder and then wrap it as she would any other piece of glass.  She's decorating the perimeter of it with a combination of circular and teardrop accent pieces and when this is finished I'm sure it will turn some heads.  Interestingly enough Jan is making this upside down because the plate only lies flat when it is upside down.  


Carol was hard at work on a new Beveled Fleur De Lis Window that she had completely assembled and ready to be soldered by the time class ended.  This is essentially completed already.


Terry finished five name panels this week but I forgot to take pictures of them!   She also worked on this beautiful flowing Angel which she already has cut out.  With a lot of the grinding on this completed I'm thinking that she'll surely have this ready in time for Christmas.


Lara's Starry Starry Night Window is all wrapped and officially tacked together now.  She got her thin inner border cut and it's all ready to be ground and then tacked into place.   After that she 'll just need to add one more border before she can start soldering this large window. 


Linda F also worked on this Christmas Lights suncatcher.  She'll be adding a background and a border to this thus turning a suncatcher into a full fledged window.   


Jeannette has been working fast and furiously on her large Christmas Window.  After getting her Bell section wrapped and tacked together she worked on getting all of the background pieces cut and fitted into place.  Next up she's got and inner border that is a little more complicated than normal since so many central design pieces cut into it, and then there's the final outer border which will go on quickly enough.


Linda L has her Mickey Mouse all ground and looking fabulous.  The nose is a glob that has actually been ground into the center of a solid piece of glass which is something most people will look at without realizing how difficult it actually is to do.   Once this is tacked together the background and the border should be a piece of cheese cake.


Mary Grace is soldering her Tree Of Life Window and with the front side almost finished she'll be able to flip this over and work on the back side.   This really looks great!


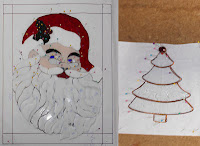
Bonnie continued along with her Santa Face window knowing that she's in a race to finish him before Dec 25th. If by chance it's not completed it will surely be finished for next year! Let me tell you that the work on this is flawless.


Martha has all of her Daylily window ground and is ready to begin foiling now.   The soldering on this should go quickly for her and since it fits together beautifully I have no doubt that the finished window will turn out beautiful as well.


This week we saw Mary complete the soldering on the front side of her Irises and Dragonfly Octagon.   With just the back side to go I'm thinking that this will certainly be finished when she returns next week and that means that her Christmas deadline for finishing this will be achieved!  She's done a beautiful job soldering this and she sees that slow and steady not only wins the race but also makes your soldering look better.


Sheri got all of the borders cut for her Peacock Window and she'll be soldering this before you know it.  In fact, with just the final border to wrap and tack, she can begin soldering this while at home if she wants to.  That includes both the front side and the back since the channel can go on any time.  She just needs to not solder to the edge of the glass and she'll be fine.


Here's a look at the window that Melissa was dying to start work on.   There's not a Cross in sight in this Sunflower and Bee pattern and that's the way (uh huh, uh huh) she likes it. (Uh Huh, Uh Huh!)


Shelley has been busy grinding her Tree Of Life Window and she's missing a few pieces here and there in the background and the leaves but we aren't worried about that since they will be easy to add once everything is tacked together.   Shelley has also learned that sometimes numbering your pattern and glass pieces is a good thing.  I know she's really going to love this when it's completed because she's already in love with Mary Graces!


Susan D has most of the leaves and petals for her Holly Bouquet assembled and will be finishing this off at home.   She's about to become a grandmother (yet again) just before Christmas so we won't be seeing her for a few weeks.  We wish both her and Kaitlin all the best!


Brenda has a LARGE window that she's working on at home but she didn't want to haul it into class this week so she worked on grinding this Beveled Cross suncatcher that she had cut out months ago and then more or less abandoned.  Now that it all fits together I'm sure it will see the light of day.


Then we have Rowena who made another Stylized Angel suncatcher this week and only needs to solder it to finish it off.


Twofer Betty has all of a second Madonna and Child suncatcher all cut and ground so this will most likely be completed upon her return.


Finally, this is what Tracey worked on this week.   Yep, that's her spot on the table where she started tracing out a new Madonna and Child Window that I never got a picture of.   It was my bad but I promise to have a picture when she returns.


Paul
Bayou Salé GlassWorks

Monday, December 11, 2017

A Texan, A Virginian, and a Coon Ass

Here in our classes we tend to use three foil sizes over and over again.  We still have students that are confused as to which size should be used for their pieces so here's a handy little list of the three most popular sizes and their applications:

3/16 (Small)
7/32 (Medium)
1/4 (Large)

3/16 foil is used on pieces that are VERY tiny.   We're talking about pieces that are so small that they would be or almost be completely covered in foil if we used the regular sized foil on them.  We also use 3/16 foil to wrap bevels and for any glass used to make a curved lamp.

7/32 foil is what our standard foil.  It's what we use on about 98% of our pieces.

1/4 foil  is used when you are making a large window about 3 foot by 3 foot, or bigger.  The larger foil ensures that more lead will be used therefore making the window sturdier.

Remember that these three sizes are just the tip of the foil iceberg-- there are plenty of other sized foils out there but these are the ones you will find yourself using most.


Okay then, with that out of the way we take a look at the Madonna and Child window that Tracey completed this week.  It's certainly a beautiful window indeed.  Her soldering really blew my socks off because as one of our newer students, Tracey showed soldering skills that usually takes years to master.


Myrt completed her small Christmas Ornament which is actually about the size that you see here on your screen (unless you're looking at this on a phone).  I don't think it's more than 4 inches wide which means that all of the pieces that make this up are VERY tiny.  Yet Myrt used 7/32 foil on all of it.  Although the pieces are tiny they were never in any danger of being completely covered by the foil.   Myrt wrapped all of these pieces perfectly with 7/32 foil.


Rowena started and completed this Modern Angel Suncatcher in just one class.   With a beveled head and a hand spun wire halo this is a very stylish and fun Suncatcher to make. 


Melissa finished two more crosses and that means that she's only got one more left to go!  I know she's thrilled about this fact because working on projects 'en masse' can really get to you after a while.


Lara spent a lot of time at home on her grinder but her work was very rewarding indeed because her window is all ground!   She's begun wrapping her pieces and this now looks very much like the famous painting it's been drawn from.


Carol brought in her 'Gator' Window which just needed some borders cut for it.  Her work on this while she was at home is nothing short of brilliant.   With her inner border attached and the outer border just needing to be wrapped, I'll say that this window is as near to being completed as a window can be.   This will be seeing some backlighting before you know it.


Mary had finished wrapping all of her pieces while she was at home and immediately set to work on tacking her window together when she walked in the door.  Once that was done she learned how to cut the angles on her octagon border to get a perfect fit.   (It's a simple process once you know what to do.)  By the end of the night she had wrapped her final 8 pieces of glass.  Next week she'll add a channel to this and then begin soldering.


Cindy almost finished up her Santa Window but when she left class it still needed to be soldered.   Have no fear though because the next day she  brought it back in all soldered needing just hooks and some channel to finish it off.   Sadly, we wont see this completed because she's delivering it Friday before she comes back to class.  I did see it completed and the end result was incredible. 


Jeannette came in and tacked together the center JOY ribbon section of her Christmas Window and then tacked together the poinsettia in the bottom right of it as well.   Once that was finished she started cutting the bells that reside in the upper left.  Now that she has her bells all cut and ground she'll definitely be adding the background and even the first border to this LARGE window when she returns.


Mary Grace cut out the multicolored border for her Tree Of Life Window and I was correct-- she loved doing it.  From the angle of the cuts to the color placement, it was all whatever she had closest at hand.  The only thing that she purposefully avoided where two of the same colors being next to one another.   She's in the process of wrapping all of these pieces and once that's done she's going to be able to start soldering this tree.


Beth soldered the front side of her Dragonfly Window and let me tell you that this girl can solder!   I was astounded at how wonderful a job she did on her very first window.   She moved her soldering iron slowly across the window, never 'painted' (traveled back and forth over the same line) and always allowed the tip of the soldering iron to rest on the glass as she soldered.   By paying attention to these three tips the soldering on the front side of her window looked almost like perfection.  Consider this finished when she comes back in and does the same on the back side of her window!


Meanwhile, Bonnie is hard at work grinding her own Santa Face Window and she's down to the whiskers on him now.   She also worked on a smaller Christmas Tree Suncatcher which she's just about ready to solder now.


Linda has her Quilt Block Square almost completed now.   Made from four repeating smaller squares that 'revolve' along a center point, this is a very stylish project that will certainly be completed upon Linda's return.


Ann is back and resumed working on her Stylized Crosses.   I do believe that she managed to cut out four of them while in class and then even managed to completely grind one of the the large Crosses.  As you can see from the picture below it's ready to be wrapped and soldered already.


Sheri continued working on her Peacock Window and got all of her background glass ground.   Once that was done Sheri added small glass globs to the points in the background where lines intersected.   Her first border is all cut out and almost ready to be attached leaving just one border left to go.


Susan D is working on a Christmas Poinsettia Bouquet which will be finished in a 3D fashion.   She got all of her pieces cut, ground and wrapped while she was in class and you can see the previous rendition of this design resting behind her glass pieces to show you what the finished project will look like.


Becky got a round zinc channel attached to her Geometric Window and then completed soldering the front side of her window.   She's added wire accents to the pieces that have been covered in lead which I'll be sure to focus on when we see this in its finished state.  Since Becky is already working on the back side I'll say that I wouldn't be surprised if this is finished upon her return.


Terry is working on a beautiful clear textured cross Window that doesn't photograph well at all since you can see through almost everything while it's lying on the table.   In person it looks great but the best I could do to let you see the effect is to get some glare on the glass so you know it's there.  I only wish the picture did this some justice.


Barbara H resumed work on her own Madonna and Child this week and is all set to start soldering it.   Since both Jan and Tracey were able to solder theirs in one class I'm thinking that Barbara will easily finish this next week and then move along to her Beveled Turtle project.


Linda L's Easter Mickey Mouse is coming together right before our very eyes.  She's been busy at the grinder and you can see what a great job she's doing getting these pieces to fit together.   Next up is the face which is the most important part of this window because if the eyes are off at all the entire window will look 'off'.


Next we have Martha who resumed work on her Day Lilly.  She spent her night at the grinder and started at the bottom of her project.  She's up to the flower petals now which means that this will be completed before you know it.


Shelley is working on her own Tree Of Life and seems to be a bit jealous of the work Mary Grace has done on hers, but MG started before Shelley and I say Shelley is doing just fine.   She's discovering that a lot of the leaves that make up this window look very similar and that it's okay of one or two get swapped around while she's grinding as long as they fit into place when the grinding is done.


Susan R forgot to bring in her sheet of glass for her Christmas Package so she did what she could with the glass that she had with her by managing to get the bow portion of top cut out and ground.   The ribbon of the top section just needs four pieces of clear textured glass cut out to finish this up now.


And that's all of it in a single Blog Post-- everything that occurred in our classes during the week!

Paul
Bayou Salé GlassWorks