An inside curve is the toughest cut to make. If you've taken a class with me then you've learned about cutting point to point and have seen how we can whittle away at glass to make an inside curve easier to cut out. What people don't realize is that you can combine the two methods to achieve your final goal. Let's start with a deeply curved pattern piece that we want to cut. The most important thing is placement. We need glass (a lot of it) behind the curves and that means that we should mark our pattern piece on the glass as seen below. Note the amount of glass BEHIND the curve. There's no way to place this any better.
Next most people will want to cut all those easy outside curves but don't do it! The extra glass behind the inside curve provides stability and strength. Remember to ALWAYS cut your inside curves first-- even before separating your glass pieces. You'll note that by placing the pattern where we did on the sheet of glass we've already made the 'point to point' cut thus saving a step! Our first cut would then be a small graceful scoop followed by yet another which would leave us with what you see below.
Many, if not most, stained glass artists would determine that they need to grind the rest out with their grinder or even use a glass saw. Myself, I rarely use a saw mostly because I can get the curve cut faster alternating between my grinder and my cutter rather than taking the time to haul out and set up my glass saw. In this case I'd tackle it as follows. First I'd channel into the deepest part of the curve with my grinder. Once I get to the line of the pattern near its deepest point I stop.
Now you I can use my cutter to make straight cuts and remove large pieces of the excess glass easily without having to slowly grind them away. You can see the first two pieces I've removed using my cutter below.
At this point new opportunities arise that will involve either your cutter or your grinder. Remember that you can grind anything into submission but that it takes FAR longer to grind something away than it does to cut it away. Using a combination of cutting and grinding can save you both time AND grinder wheels. I hope this helps.
So first up we have Lara's Tropical Beach Scene which is a perfect example of how mixing similar colors can add depth and realism. It would be so easy to make this with just one green for the leaves, one orange for the sky, and one blue for the water but Lara instead used three greens, three oranges, and three blues to absolutely drench this Tropical Sunset with color. It's tranquil yet vibrant as well as both cool and passionate. In other words, it's exquisite!
Cindy's Nautical Tray which is purely decorative--NOT functional (of course) is absolutely stunning. Cindy picked her colors knowing that there would never be any light behind the glass so her use of bright colors was essential. What amazed me most about this was just how sturdy the tray became once the one inch bevels were added as a lip surrounding the edge. Cindy put a lot of time in on this and it certainly shows. This is gorgeous.
What is it about orange skies, red suns, and green leaves that evokes a feeling of peacefulness? Lisa's circular Matsu Tree was certainly inspiring on its own but once she put it in the semi-circular display stand it took on a whole new magnitude of serenity. The word Matsu means "waiting for the soul of a god to descend from Heaven" and this piece emphasizes that sentience perfectly.
Next up we travel a different route toward the opposite end of the color spectrum where we arrive at Let's modestly colored Dragonfly Panel. In terms of color there's nothing here to draw the eye but once it's calming beauty has been noticed it's difficult to look away. Here we have yet another peaceful window that provides serenity for the viewer, which was beautifully crafted by Let.
Now if you want something cute then look no further. Betty's trio of birds depicts how a lot of us feel from time to time! Based around a hoop, Betty created three similar birds and then simply tacked them to the horizontal bar that this hoop came equipped with. It's a great idea and its simplicity is what makes this so charming and sweet.
Judy's Sunflower Panel shocked me when I hung it up to take its picture because I had thought that she'd used root beer for her border. Imagine my surprise when I saw it light up purple rather than the expected brown. I love that she broke the mold and went with something other than what we normally see. Although it's a dark purple it still brightens up the window immensely! Also, Judy made this from start to finish on her own with a minimum amount of help. I do believe that she's got a firm grasp on this stained glass stuff!
Barbara had been asked to turn a child's 'drawing' into a stained glass window and the end result is, honestly, a very satisfying avant garde piece! Yes, some changes had to be made to convert the original marker drawing into cut-able stained glass but the changes were minimal and the feel of the design was maintained faithfully through the conversion process. I find it oddly compelling! What do you think?
We had a new student this week and Robert began his stained glass career with a requisite Butterfly Suncatcher. Robert managed to cut his glass perfectly and also recognized many different techniques to make each of the steps go faster which I normally don't spring on students until they have a window or two under their belt. He's a natural at this!
I believe it was two weeks ago when Linda L said that there was a window that she needed to have completed in time for Easter. She wanted to know if she should stop working on the project that she was currently making (the three Beach Windows) or if she should wait a while before starting her Easter Window. I always tell students to work on items that have deadlines first and then move onto windows that you can take your time completing. That said, Linda finished her Easter Bunny Panel with time to spare for the holiday. Now she can relax knowing that this is finished and that she did an excellent job making it as well.
Cheryl H finished the box bottoms for the Mr Bingle lids that she had completed last week and at the very end of class we got them attached to their box bottoms by using a tube and rod for the hinge system. The end results are very 'Merry' looking, and dig those little lead feet in each bottom corner!
Number ten is finished and installed. That means that MiMi only has four more windows to go and the good news is that they are MUCH smaller than any of the other inserts she's created. Those last four are going to move quickly and then MiMi will move herself along to something that contains a curve or two, or maybe even nothing but curves in it!
The windows themselves are impressive but when you see all of MiMi's top cabinets decked out in her Hexalong Multi-Texture® design you have to admire just how much work MiMi has put into them. They are astounding. And don't you dare say Chicken Wire!
And finishing up our completed projects this week we examine Susan D's last four Tulip Flowerpot Ornaments. They never need water, they never wilt, and they always look fresh and inviting. Perfection indeed.
Mary Grace has her Peacock tacked together and ready for its first border. She wanted to leave the top curved but I'm worried that a window this size won't be able to support its own weight unless it is completely surrounded by channel. The small curved top prevents us from putting channel along to top edge which would help support some of the weight so Mary Grace will add a final clear border which will square off the top and allow for channel to surround all four sides. That means that this window will surely be sturdy and last for a lifetime.
Jan resumed work on her Old Fashioned Santa Window and is determined to finish it. The good news is that she only has the green leaves left to cut out which she will cut into some of the background pieces and some of Santa's clothing (that we've left unfoiled and untacked). Once the leaves are ground and wrapped the rest of this will go fairly quickly.
Susan R's Chocolate Hearts Suncatcher is almost complete needing only its reverse side soldered before she can put some hooks on it and hang this in her window. She's so very close and now I have a hankering for some milk chocolate!
Speaking of close, June's Biplane Window will certainly be tacked together when she comes back in. There are about 3 pieces left to wrap and then she'll tack everything and then make the final cuts in the pieces that she intentionally hasn't foiled. This enures that the struts line up perfectly as you'll see when we come back again next week.
Ann is grinding from the outside inward on her Lady Of Guadalupe Window. With most of the background pieces all fitting into place she'll begin grinding the Lady herself when she returns. Once that happens the subject (Mary) will become much easier to recognize.
Shelley's Circular Mermaid is all cut out and she's ready to begin the grinding process. She's used the same glass for the water that Cindy used in her Nautical Tray so we know that it will be nice and bright. Add the fact that this piece WILL have light behind it and you can see that Shelley has set herself up to have an incredibly vibrant Mermaid when this is finished.
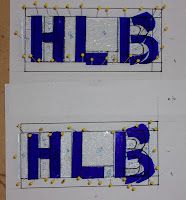
Linda F now has one of her HLB panels ground and has shifted upward and onward to the second panel of the same design. It's far more advantageous for her to grind during her class time rather than foil glass which she can easily do while she's at home. Besides, why drop the ball when you're on a roll grinding, right?
Martha's making a Yellow Rose Of Texas, or perhaps it's simply a yellow rose. Nonetheless, it's already looking beautiful even with only the petals having been cut and ground. Just look how perfectly everything is fitting together. That's what you call 'talent on display', plain and simple.
Annette has begun grinding all of the flowers and stems for her Transom Window starting at two opposing ends. The upper left flower is ground and the lower right stems have been ground as well. There are a lot of pieces here so it may take a while before she can begin wrapping these pieces but as I always say, "Slow and steady wins the race."
You can't really see it here but there is white glass piled in four different humps which is actually the white 'background' glass that makes up the skull in this Sugar Skull. Sheri's version is far more colorful than mine is and I love that she brightened it up so much! This will surely be a stunning piece of stained glass when Sheri completes it.
Now that this is all ground and tacked together you can easily see how smoothly and elegantly Mary's Morning Glory Window is. Mary took her time on this, never rushing and always looking for perfection. With the front side already soldered I'm thinking that this will be completed upon her return.
Barbara H apparently loves to work with tiny pieces. She's extended the 'canvas' on this Louisiana Iris by adding an inch to the background on all four sides but she's kept the flower in the center the same size that it was when she originally made this piece. In short, what you are looking at is a panel that measures 8x8 with only 6x6 of it consisting of small flower pieces.
Melissa is beginning a Heron Window that has a very detailed background that includes multiple irises and many, many kalanchoe blossfeldiana's! There's a lot of detail here but the pieces are fairly easy to work with which makes this a fun window to make.
Lastly we look at a pattern that Shawn is about to embark upon. We are going to change out the flower in the upper right hand corner so I've whited out the area for now. This pattern is based on a painting and although the flower that was in the upper right corner looked fine in its original small form we all agreed that it lost most of its definition after being enlarged. You'll see what we replace it with in the weeks to come.
It was certainly a busy week as you can tell by the size of this post. I was hoping to have this up quickly this morning but I didn't realize just how much I had to write which explains why it's well into the afternoon as I post this.
Paul
Bayou Salé GlassWorks