Some cuts are trickier to make than you might initially believe. Take, for example, the piece of glass below. It's just four simple straight cuts, right?
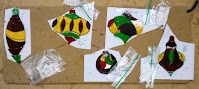
Well, most times when students cut an angle on a thin piece of border glass it ends up with chipped corners looking something like this.
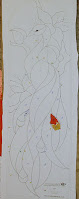
Let me show you how to easily fix that by adding a fifth cut into the mix. Before cutting diagonally on the red dotted line we need to remove some of the extra glass so that the break will more accurately follow your score line. Do that by first cutting away most of the excess glass before you make your final score. In other words, cut along the green line first. Once the extra glass has been removed you'll find that your points will remain intact and your final piece will perfectly match your pattern.
So first up we have Lara's Sunburst Window which is incredibly vibrant. And let's face it, her craftsmanship is, as always, spot on. I was worried this wouldn't light up very well for its picture since we're out one light bulb in the area of the shop where I take pictures, but it shines just fine. It's certainly spectacular as is but just imagine this with sunlight behind it knowing that what you see below is only being backlit by a single florescent light.
Sheri's Neoteric Face is colored in overlapping hues of similarly contrasting colors featuring a strong influx of African art. The glass, on its own, would be worthy of any heightened praise but Sheri has added six strands of wired hair which points to the likelihood of new reality. In short, her latest work is obviously aimed at the common man's quest for both assessment and a new hope that signifies precisely the being of all it represents. Bravo!
On the other hand, Jan's Halloween Witch is out the door and up, up and away. The varying density black glass that she used throughout this really appeals to me and I'm hoping that we have more or can get more. Black glass is normally very stark but this works so well with Jan's witch especially against the subtle light gray background that forms the sky. Can we say spooky in a fun way?
Mary's Madonna and Baby Jesus features a rich, deep blue glass that I love so much. She worried about the border being the same glass as Mary's robes but a perfect match is just as perfect as a similar match when it comes to borders. Truth be told, I briefly thought about suggesting an amber border but I'm happy that she used the blue glass. And Mother Mary is happy as well.
Linda's latest Cross is a mix of swirling greens and blues-- two colors that go together possibly better than chocolate and peanut butter. Of course you just can't go wrong with this pattern because it's by far our most popular Cross pattern. Linda's version of it shows you just why that's the case.
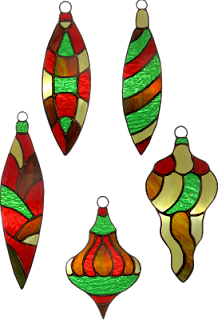
Susan D's six Beveled Christmas Ornaments are officially ready for hanging. I always say that symmetry and straight lines are the toughest things to accomplish in stained glass. Susan did a great job with her symmetry here.
Tracey finished a pair of Ornaments of her own in what she called the 'How The Grinch Stole Christmas color scheme'. I hadn't noticed it but now that she's said it I can't un-see it! Nonetheless, they are fun and festive.
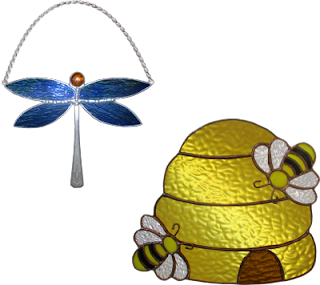
Here's one more Cutlery Dragonfly that Betty completed and it's just one of five that she finished this week. She's a pro at these now!
The last of our completed projects this week is my rendition of a Sugar Skull. I always liked the way you could go wild with color with these festively shocking skulls but when I saw one online that was so poorly executed I decided that to do this correctly I'd just have to draw up my own pattern. The only color that I used that wasn't scrap glass was the white skull itself. As a bonus, it was finished just in time for Halloween!
Lisa finished all the soldering on her quadruplet of Unicorns but she accidentally left the clips that get attached to the back of these at home. What do the clips do? Well, they turn this stable of mares (or are they males?) into nightlights! Honestly I can't tell one from the other so good luck naming them!
As I said, Betty had completed 5 more Cutlery Dragonflies and you can see them all here along with the nativity scene that she's also working on. Betty reconsidered the glass that she had originally picked for the mountains behind Mary and Joseph because I honestly thought it was far too light for use in a night time scene. I have to say that her dark green-brown choice is a much better fit for this window.
I do believe that Susan R's Kitty With A Pumpkin is absolutely adorable! She's already got it ground (save for the eyes which I always do after all of the face pieces have been ground and tacked together) so this will certainly be finished in time for Thanksgiving. If she plans on making this for Halloween it will surely be finished for Halloween 2022 (since Halloween has already passed us by as I type this).
Linda F is working a a beach scene that she drew up by merging a beach ball and a pair of sandals that she found in a coloring book. This is exactly how I began drawing patterns and I have to give her another gold star for overlapping the two subjects rather than placing the ball on the left and the sandals on the right. It's safe to say that Linda has an eye for balance AND design.
Susan D completed her ornaments and is now beginning to grind all of the pieces for a new panel that she cut out while at home. Okay, I know that it's hard to see right now but when this is assembled and everything has been ground you will clearly see that it's a plaque that reads: Est. 1965.
Cheryl has begun and finished cutting out the glass for her new Grinch Window. In fact, she's already begun grinding! This guy is always popular around Christmas time, which reminds me: Why doesn't the Grinch like knock knock jokes? Because there's always a Who there.
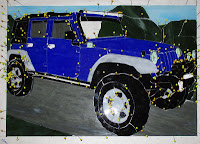
With her Jeep needing just a little bit of touching up here and there on the soldering (which I've volunteered to do), Cindy has begun work on her next vehicle- a classic Corvette. She's taken it home with her so she can get this finished within the next 2 weeks because these two window have a second week of November deadline!
Having completed her Halloween Witch Panel, Jan has slid into Christmas by getting a border attached and most of the front side soldered on her Santa Claus Panel. It won't be long now before you see this finished and ready to decorate a Window for the Christmas Holidays.
What is this strange looking glass design and how will it ever be used in a standard household setting? Yep, MiMi is back to work grinding hexagon-ish pieces for what will be her 8th window. The end is still somewhat far away but on the bright side of things, it's never been nearer!
Judy spent her night grinding away and with only the top row of bricks left to be ground I'd say that this Louisiana Hot Sauce Window is going to get some foil applied to it real soon now. Yes, the items on the table weren't the easiest thing to grind for a somewhat new student but Judy persevered and she's getting to understand the grinding process much better than she did before. It's all about trial and error but there's very little error here.
Well if you want to talk about a productive night let's look at Kerry's Parrot Window. He finished grinding the wings and head of the bird, wrapped all of the pieces, tacked it all together, and then even got his border cut as well. When I say that it won't be long until this is finished I truly mean that it will be completed before you blink your eyes!
Bee has the back side of her Flowerpot Window almost soldered now so I'm thinking that this will also be completed the next time we see it. Bee worries about the quality of her soldering but it's absolutely wonderful. I defy her to show me anything that's for sale in a store that looks any better than her work. She can look any and everywhere but she isn't going to find soldering that comes close to matching hers.
Linda L is very close to finishing her last Angel window. There's just a little bit of soldering left for her to do on the back side and then she'll move along to soldering this cute little cross suncatcher which will surely be completed at the same time her Angel is.
After finishing the work on her Madonna and Baby Jesus Panel, Mary decided to make a few small suncatchers. She's dipping her foot into the Christmas Ornament waters by starting with this lovely and somewhat complex design (as compared to some of the other choices). Looking at what she's already cut out, I think she's doing just fine
Ann also worked on cutting more glass for ornaments and by the time her class was over with she had five more ready to hit the grinder!
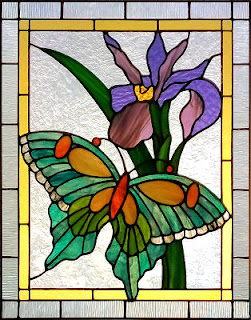
And last but not least, Mary Grace has begun working on a long Peacock Window. It started out featuring a beveled Peacock but them MG decided to actually cut the bird out of assorted blues to give the window some color. By the time everything was traced out and her glass was picked she only had time left to cut out two pieces-- an orange and a yellow center of one of the peacock feathers. More will follow in the weeks to come
So here's the deal. You won't be hearing from us next week because we will be on vacation for a 7 days and therefore we won't be having any classes. What are we doing, where are we going? Nothing, and nowhere. We'll just be working around the house and I have a window to make for someone. Fun, fun, fun!
Paul
Bayou Salé GlassWorks