When things go wrong, let's say a piece of glass you've scored doesn't break the way you wanted it to, don't just repeat the same exact process without examining the situation first. Ask yourself why it broke. If you can figure out why it broke then you can most likely fix the situation on the second pass rather than experiencing the same result. Perhaps you'll realize that you've forgotten to cut 'Point to Point'. If so, fix that. Perhaps the break was following the score line perfectly until the very end where it then veered off. If so, perhaps using your pliers on the other end of the cut instead of the side you first tried will help. If the hook you are trying to attach keeps wavering out of position perhaps you can brace the pliers you are using to hold the hook against something to prevent them from moving. If the poster board keeps shifting under the pattern you are tracing you should try taping it down more securely.
Look at all bad situations and try to ascertain what went wrong. If you can't figure that out or come up with another way to attack the situation then 1) STOP and 2) Bring the problem to class where we will figure it out together.
Things happen for a reason and if you take the time to figure why things went wrong you can usually rectify the problem.
So take a look at this Address Transom that Cindy made! It's already been installed at the Lamplighter Coffee House and Bistro in Franklin, LA. This picture in no way hints at the size of this piece. Perhaps the next two pictures will.
Here's the window as seen from outside. Those red numbers match the color of the door wonderfully. The mailman isn't going to have any problem figuring out what mail comes here!

.
And here we have a picture of the window as seen from inside the Coffee Shop. The motif is spot on and Cindy's work was flawless because when they went to install it the window fit into the opening like a glove.
Next up have Sheri's Stained Glass Cross/Heart now completed. You have to admit that all of those colors draw your eye straight to this cross. She used an etched clear border that definitely looks white in the picture but is actually somewhat transparent when seen in person.
Martha's made an evening sky Cresting Wave Window and this is another project where the colors contribute greatly to the finished piece. She could have gone all blues but this flat out rocks with all of that color. Waves are not measured in feet and inches; they are measured in increments of beauty.
As hoped, Robert was able to complete his second Door Insert. I realize that I've been using the wrong terminology in the past weeks referring to these as Transoms but the point was still made. Here's the final second panel as it left the shop.
And here are both Inserts residing in the doors that they will call home for a long, long time. Absolutely gorgeous.
And this is Steve's latest lantern all lit up and proving that even scrap glass can build an extraordinary piece of art. All it takes is a bit of talent, some imagination (and a good woman beside you).
Judy's newest Open Arms Angel is the last of these we'll see for a while. I could be wrong but I'm thinking that she started this only last week and here, two weeks later, it's completed. I think that's incredible progress because even though we've trimmed out some of the superfluous pieces this is still a fairly complex project. And Judy made it look simple.
Sheri also finished another Easter Rabbit and has one more to make which will be even larger than this one. Something tells me that we won't see that big bunny because the person who ordered it probably wants it in time for Easter and we won't be having any more classes until the week after.

Betty has another passel of Suncatchers finished and ready to be sold. You can easily see the three different Tulips that she made but what I didn't add to the picture are the other five Dragonflies she walked out the door with. The more items I add the smaller the image gets so I figured one dragonfly would give you the general idea.
And here's the last of our completed projects. This is the actual Cross that Ann finished last week. I like to keep a week by week record of what everyone was working during class and Ann was gracious enough to bring her Cross back in when she realized that I hadn't snapped a picture. You've got to love that Krinkle Glass that she used for every piece of this Cross. The only problem with Krinkle is that you don't use it without cutting yourself at lease a few dozen times because it is razor sharp!
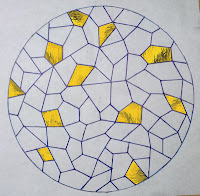
Ann also began work on a colorful hodgepodge of Polygons. When this is completed she'll be adding a cross on top of this colorful design. She's begun cutting the yellow glass but has the rest of her colors all mapped out now. That means that we'll see a lot more color in this when we see it again.
Jan's newest project is a Plate Window. She's already ground the edges of the plate and wrapped it in copper foil so that it can be soldered directly into the window. You may have noticed that the four corners are missing. Things were very tight in getting this cut out of one sheet of glass. Truth be told, we couldn't do it without taking one strip from another sheet. At first we thought that we'd need a second strip from the second sheet to make the corners but we're going to get those from the circular waste piece that the plate has replaced. Waste not, want not.
With two of her side panels completed Cheryl has moved on over to the back panel which she cut, ground, wrapped and tacked together. Her next panel will be the reverse of this with a hole in the center to allow birds access to this wonderful bird apartment.
Speaking of birds, Mary has her Bird and Flower Panel all cut out and ground save for the leaves. Once she wraps and tacks the bird together she will fit the final three leaves, tack them into place and then cut out the background. Honestly, this is almost finished already.
With the center initial oval of her Transom Window tacked together Annette has begun cutting the clear textured pieces behind the flowers. She's already got a quarter of it cut out and tacked but they are impossible to see the glass against the white pattern paper. What you can see though, is the iridescent colors in the white glass that she used for the background of the 'M'. You can only see it where the florescent bulbs are reflecting across the glass but at least it's somewhat visible!
June has certainly gotten the hang of grinding pieces to make good, clean fits. It looks to me as though she's got the hardest parts of this Rooster ground so I think she'll be able to finish the remaining grinding and then move along to foiling each of these pieces when she comes back in.
Susan R's Girl On A Swing was essentially finished but then Susan decided that it looked somewhat bare. When Susan comes back in she'll have added a branch to the top and some green grass below this swingin' girl. Trust me when I say that it's going to be stunning!
After she finished washing and waxing her Transom Address Window Cindy was going to relax and take it easy for the remainder of the night but then she saw that she had about 45 minutes left to go. It wasn't a lot of time when you consider a full class is three hours but she decided to work a bit on her LSU Plaque. Just look at what she accomplished in that time! Making stained glass CAN be a slow process but if you sneak in just a little bit of work here and there you can move glass mountains!
Now that Lisa has the six panels of her Spinner all ground, wrapped and soldered all that's left to do is to join these all together by soldering the connecting seams. She's got a mold (or is it a jig?) made for that and I know that she's made some of these on her own so perhaps this will be completed before she comes back to class. She's got a good man beside her to help if she needs. I just hope she gets a picture of it spinning in the wild for me!

Susan D's Fall Panel is all foiled and ready to be tacked together so she can next cut her background glass. Why did she wait to cut and grind the background (aside from the fact that I told her to)? Well, when you have this many pieces your window is going to grow a bit after you've foiled it (you've actually placed two pieces of foil between every piece). Not having the background cut out allows things to expand inward without having things twist horribly out of shape. We may have smaller background pieces but this is what we want. The subject should NEVER be altered to fit the background. Cutting the background glass after the subject has been foiled and tacked together is the best way to handle a tight situation!

With her new flower for the upper right corner drawn out Shawn was able to both cut it AND grind it as well as tack it together. The same goes for the flower in the upper left! In the weeks to come she'll be grinding one arm at a time and tacking it together as she goes along. This is really taking shape now.
With just three to go, number three is getting close! MiMi will most likely need a cutting lesson if she can't recall how to cut curves after a year of straight line cutting. Let the count down commence!
Mary Grace has the front side of her first of two Peacocks soldered so she'll be flipping this over and doing the back side when she returns. She took her time soldering and her lead lines prove it. Many people rush through the soldering process and end up having to do lines over and over and over because they just didn't travel slowly enough on the first pass. Slow and steady ALWAYS wins the race when it comes to soldering and it's the only way to get a smooth, even bead.
With her Wrought Iron Cross all tacked together this will be done before you know it. Lara has made sure that everything is perfectly symmetrical (she accomplished that by following the lines of the pattern) and that means that this will hang nice and straight. For a cross with only two different sheets of glass in it, this sure is colorful!
And to wrap things up we take a look at Kerry's Shrimp De Lis Window. Each of those pieces of glass has been wrapped in foil and when Kerry returns he'll get a border on this and then begin soldering. The end is truly near. He just has to decide on a border color (or colors if he decides to double border this).
And that's all there was to write about. Everyone have a very Happy Easter!
Paul


.png)


.png)


