Blue Sharpie Ultra Fine Point Markers are the best marker to use for your stained glass needs but they have delicate tips which must be taken care of. Here are my 5 simple rules which enable me to use the same marker for weeks at a time.
1) Never trace along the edge of a piece of glass that hasn't been ground. If you trace along a sharp edge you will almost surely ruin the tip of your marker. Grind it (and dry it) before tracing along any piece of glass.
2) Apply on the slightest amount of pressure when marking your glass. Pretend you are drawing a line on a new born baby because using any more pressure than that will only blunt the tip of your point.
3) Never go over a line back and forth numerous times. This only makes the line wash off quicker when grinding the piece. One pass is enough.
4) Never draw a line on wet glass. You can only do that about 10 times before the marker is permanently ruined.
5) Put the cap back on your marker! Also, when you throw a marker away keep the cap so you have one to use as a spare. It's amazing how quickly you can lose your marker's cap.
Okay then, Lara's finished her Fleur De Lis and it features a French Curve motif setting it apart from most of the other FDL designs that we usually see. It's twists like these that make standard traditional designs look fresh again. Gorgeous colors, perfect symmetry, and an always impressive double border help make this a VERY elegant window.
Robert's third Door Insert was completed this week and it follows a design that matches his first two windows only being much, much smaller. It's still very impressive (size matters not) and the beveled border sets it all off spectacularly. To me though, the highlight is that purple accent trim along the center bevel.
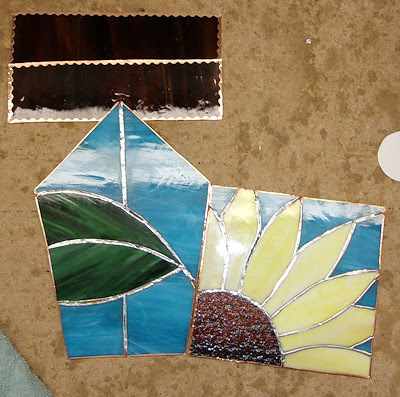
Last week Cheryl had the ten sections of her Bird House soldered and ready to be joined together. This week she did just that. The only problem we had was with the roof. She really liked the staggered panels from a birdhouse that she saw on line but when it came time to attach them we realized that stability was going to be a big issue. In the end we reinforced the edges of the roof with wire which then looped down (almost invisibly) so it could be soldered into the corner lead lines of the house. When it was finally finished the roof was as sturdy as ever. This proves the fact that that just because you see something on the internet it doesn't mean that it's a good, solid design. That said, we did fix it and if this is ever done again I know exactly what has to be done to make it sturdy from the get-go.
Lisa's newest Spinner was completed this week and this one forms a flower. Still photo's never do a spinner justice so be sure to click on the play button to see this in its full glory!
Judy has made short work of her Circular Beach Flip Flops Panel and the pastel colors work perfectly with the multi-colored border that she used. Judy always doubts her soldering abilities but I say she's doing wonderfully-- The proof is in the flip flops!
Cindy made an LSU Plaque but hers is slightly smaller from the others that we've seen in the past few weeks. First of all, hers is only 13 inches wide and second of all she's filled in the areas behind the letters to make the finished piece even more stable as well as much easier to solder.
With her first Humming Bird Panel completed Mary has learned that she needs to make 3 more of these to give as gifts to teachers before the school year ends. That's a VERY nice gift if you ask me! And I have to say that Mary's speed and work ethic was top notch on this panel.
Sheri may have had surgery but she's still busy making stained glass. She had a request to do one of these Easter Rabbit Suncatchers slightly larger than the normal size. As you can see, it turned out perfect and was possibly even easier to make since she was dealing with bigger pieces.
Cindy also spent time working on her Blue Heron Window which is being made in assorted grays. The bird itself has been completely cut and ground so Cindy next looked upward to the sky and started filling that in. She hopes to have the bird all wrapped and tacked together when she comes back in because doing that will prevent any feathers from shifting out of position and make grinding the background elements much easier.
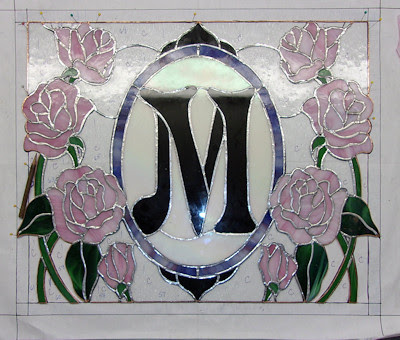
Linda F is working on an Initial Window but rather than making a simple boring letter she's covered it with morning glories. Even though they obscure part of the initial it is still plainly visible partly, in fact, due to the brilliant yellow that she used to make it. That DID present a small problem though-- she initially cut the yellow flower centers from the same yellow glass that she used for the 'M' but that made it appear as though you were seeing through the flower and looking at the letter behind it. The simple fix for this problem was to use a slightly different yellow glass for the flower centers. Perfection.
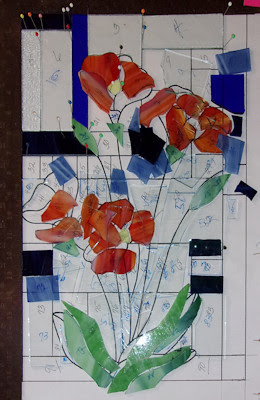
Let is making a window that will surely catch some attention in our other classes. The Poppies may be the center of focus but the background also demands attention as it uses assorted blues and clears cut into various rectangular shapes creating a fresh modern approach to a simple flower window. She's already got everything cut and now Let has moved on over to the grinder to make sure that all of these pieces fit together perfectly.
June has begun making a Nursing Window which consists of a nurses cap, a stethoscope, a hypodermic needle and an ECG Wave which will be cut into the glass after everything has been ground and fitted together. This week June began (and finished) cutting out the glass for the background which forms a heart. The color she picked is representative of children's hospitals so there's a lot of imagery in this window that will take repeated viewings to completely grasp.
Kerry decided to work on three different sized stained glass Aloe Plants which he will then put into actual flower pots of various sizes. The largest is only 4 inches wide which helps you see just how small that smallest one is in the upper left corner of the picture.
Judy worked on a Cardinal after she finished her Beach Flip Flops and she's very close to having it completely ground. We're going to change the pattern ever so slightly to fix the hinging problem that the tail creates where it attaches to the wing. This is a popular pattern on the internet and it always has a stability issue. Luckily we know how to fix that and you'll see how we do that when we return next week.
Annette's decided to go with an elaborate border for her Transom Window which features bevels entwined in glass. She has the first two rows of the three row border attached and will likely get the final border pieces affixed upon her return. That means that she's going to be able to solder this soon!
With everything but the sky/background cut out for her Heron Window, Melissa has shown to us how you can use contrasting colors to help define busy sections of a window. All of these pieces could have easily bled together and lost focus but everything is sharp and defined here. What a great job!
Ann is working from the center out on the circular background of her Cross Window. You can clearly see how well the center fits together as Ann works to achieve perfect fits. She's also cut the four small elongated dimondesque like pieces that make the center of her Cross so it's safe to say that Ann is well under way with this project.
Lisa is on a Spinner roll as she worked on grinding the 30 pieces of glass that make up her next Spinner. She's ready to start wrapping these now since she managed to grind all of her pieces before calling it a day.
Meanwhile, Lisa's husband Steve worked on making another Fused Door Suncatcher. This one has changed ever so slightly from his previous three doors because he's added eight 45 degree angle cuts to the bottom part of the door to match the original better. This one won't get fired until he gets two more ready for the kiln. He's managing one per week (precision cutting takes time) which means that in two or three more weeks (depending on when they get fired) we'll see these completed.
Jan's first Plate Window is officially tacked together and just waiting for its four corner pieces to be added. Those will cut and tack quickly which means that Jan will be soldering this when she returns. This shouldn't take that long to solder so who knows what it will look like when we see it next.
Here's another Aloe Plant which will reside in an actual flower pot when you see it next. Susan R is so close to finishing this that it isn't even funny. This one, however, is nowhere near as small as Kerry's are because when these three sections are tacked together they will stand (or perhaps 'tower') at 12 inches tall.
Martha's Butterfly is all cut out and she even figured out the measurements for her border pieces all on her own. That may not sound like much but it actually involves a bit of math that intimidates our students so much that I usually break down the pieces for them. I guess I need to walk away from that old habit-- Martha has proven that our students are perfectly capable of doing the things that they fear doing.
Lucky number 13 is WELL under way with MiMi's latest hexagon window and I suspect that we'll see some foil being applied to these pieces real soon now. MiMi has proven that she has the fortitude of a triathlete when it comes to finishing this project. She's never lost sight of the finish line and she's never wavered from the course.
Betty's got another Owl underway and this is being done in assorted grays which compliment the almost teal/blue eyebrows and neck feathers. These Owls are becoming quite popular.
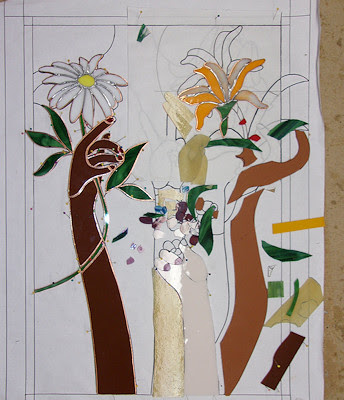
Three arms down and one to go! Shawn's got a good handle on this multi-armed window. We ran a small test on the brown fusing glass that she used for the first arm by leaving some flux on it for a week. Sure enough, as suspected, it left some marks. That's why we aren't going to tack anything together until Shawn only has background pieces left to cut. With a little luck we can get most of those pieces cut and ground in just one night.
This beautiful Fall Window is, for all intents and purposes, completed. Susan D only needs to add a small amount of wire work to this before she washes it, patina's it, and then waxes the lead to a beautiful black sheen. This will be a featured piece when we return next week to show you everything that happened during our classes for the second week of May.
All of our students know that even if you have a spongeless grinder I recommend using a sponge with it anyway. One thing that people don't realize is that when you add water to the grinder you should also add some to the top of the sponge while filling the tray. The bottom of the sponge will always clog with ground glass particles making it hard and unpermeable. Pouring water over it from the top helps flush the sponge a bit and allows more water to come up and onto the grinding head. That said, you should still remove the sponge once a week and squeeze it out in water over and over until you can tell that there's no more glass trapped inside of it. This quick and simple task will keep your grinder head sharp much longer and also enable you to grind faster.
So, first up this week we look at Mary Grace's large Peacock Window. These long windows are always difficult to photograph and even though the bottom of it is somewhat blown out (overexposed) you can clearly see how spectacular the finished result is. This is actually the first of two windows that she's making in this particular design. The second version will be a mirror image if this one with the colors possibly varying between them, but they will undoubtedly be a matched pair.
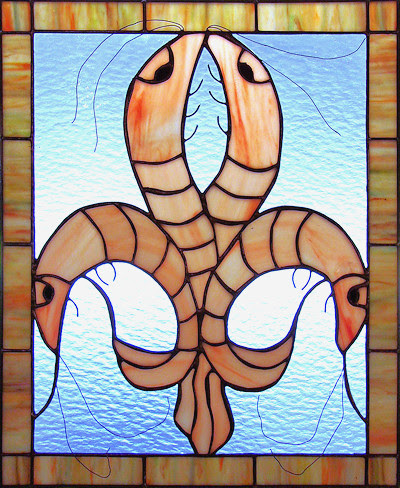
Next we look at Kerry's Shrimp De Lis Window complete with extensive wire work to form the maxillipeds and the antennae. (Who says you can't learn anything reading our Blog?) Kerry got this done in record time and his cutting and grinding keep getting better and better.
This Rooster has been made a few times in the past but the legs have always been a problem area. By placing a piece of clear glass between the legs you can make them much more sturdy than if you were to just leave them hollow, but they still need to handled with care. When June began making this I re-examined the problem area and with a simple 2 piece addition of green glass (along with the clear glass between the legs) we've managed to make this Rooster rock solid! My hat goes off to June who did a wonderful job cutting and grinding this complex piece. I can't wait to see what she begins next.
Up next are the first of three Beach Scenes that Linda L is putting together. Look at that water! It's no wonder the glass she used is called 'waterglass'. But in all honesty it's the addition of the little baby crab looking up at us from a sand dune which makes this window so cute. And lastly, check out the cutting and grinding that was done on the piece of glass that surrounds the crab-- That's some quality work right there.
Betty completed her three Rosebud Panels this week and as you can see they were made in three different colors. When you are making windows to hopefully sell it's best to provide options which Betty has certainly done here. The pattern that she used was actually cut down in size by about 50 percent and I honestly feel that these Rose Buds are much better suited to this size. Every pattern has a 'optimum size' and this one has found a perfect fit here in a window that measures roughly 12 inches tall.
Let has created another Sunflower Heart and her work just keeps getting better and better. Again I need to draw your attention to how perfectly the outside edge of this heart aligns to each previous piece. There are no stair steps here and that, along with her color choices, makes this the perfect suncatcher.
And finally, here's a different view of MiMi's latest (twelfth) completed Octagon Window Insert. If you look closely at the bottom left you can see a clip that holds the window into place in its wooden frame which means that this window has already been installed!
Lara's been moving through projects at break neck speeds and this Fancy Fleur De Lis proves it. She got it all cut out while at home and she managed to grind and then wrap all of the pieces while in class. She hopes to have this completed upon her return and I have no doubt that it will be since there's only a border and some solder left to apply to this stunning window.
Judy is making a pair of Sandals and managed to get everything cut and ground in just one class. She also has 90% of this foiled so the end is very near on this cute project.
Susan R began working on a large 3D Potted Cactus which she's making in three separate sections. Each section will be completed as a finished piece and then joined together to provide more depth than you'd get if it were assembled as one large piece. There are pro's and con's to this method, the pro being that the Cactus will have depth but the con being that the finished piece is less sturdy than if it had been soldered as one piece. Since this will be 'mounted' into a flower pot it won't be handled very often so the trade off seems fair.
Cheryl spent her night soldering the four panels of her Birdhouse and then adding a bead to the six roof sections which she foiled in scalloped foil. This foil makes a fancy beaded edge along the front of the glass which give the piece a fancy decorative look without having to deal with iron temperatures and different lead mixtures. This will surely be together and completed when you next see it.
With her left hand all cut, ground, and wrapped Shawn is ready to begin grinding the next arm in the line up. Once each of the arms and flowers have been ground Shawn will tack them together and then work on fitting the background pieces into place.
Ann's Multicolored Sphere is actually the background of a multi-part window. It's really taken shape now that she has even more colors cut and placed into position. True, she still has more than a few pieces left to cut but she's well beyond the halfway point here. Once this has been soldered together Ann will tack a stained glass cross on top of this to give the window a nice 3D effect.
Robert's third window has all been cut and ground which means that once he wraps his last eight pieces he'll begin soldering this. He was able to solder his other two windows in just one night and since this is about a third of the size of his previous windows I'd say that it's safe to assume that this will be completed upon his return.
Martha has certainly been very busy working on her Butterfly. She's even ground some glass globs into the outer perimeter of the wings which make it look even better than it did before. At first this was going to be a large suncatcher but Martha has decided to turn it into a window by adding nine pieces of baroque glass to square the butterfly off. She only has the top piece to go and then she'll put a border on this and begin soldering. All of that will easily happen when she next comes in.
Linda F's redesigned the ever popular Heart Cross by removing the heart and replacing it with a bevel. This was done to 'butch it up' a bit so to speak. Either with a heart or a square bevel in the center, this is one large suncatcher that demands attention and Linda's work on it is nothing short of amazing.
With just one piece of border glass left to grind on her Mermaid Window, Shelly is about to wrap her final pieces and then begin soldering. This will surely be finished before you know it. Round windows can be tricky but Shelley has ground this wonderfully.
With almost all of the background pieces cut out Susan D is just about ready to begin soldering this little beast of a window and finish it off. Why is it a beast? Well, it's only about 12 inches wide which means that all of the pieces in this window can accurately be described as super, super tiny.
Cindy got an LSU Plaque all cut out and ground this week and now she's already wrapping it in foil. I think that it's safe to say that this will be completed when we next see it again.
With all of her background glass cut and tacked into place Annette has begun working on the final two borders for her Initial Transom Window. The first border is just about completed which leaves her with just one more border to go. She wanted to use bevels for the final border but we're going to have to plan out something a little tricky to get that work out. We'll see what road that takes us down when we return a week from now.
And to wrap this all up we look at the next two Beach scenes that Linda L is working on. The crabs still need to be cut into place but now that she's completed one of these the other two should move along quicker. It's all about becoming comfortable with each process and now that she's done each process it's just a case of repeating the steps a second and third time.
And there you have it. Classes are filling up again and these posts are taking longer and longer to create but this one is actually getting out the door pretty early!
It's been another hectic week so were just jumping straight into things here starting with Susan R's Girl On A Swing. This piece took on a life of its own after Susan decided that it looked somewhat barren and added the tree limb and the green ground below the girl. The hoop does EXACTLY what it's supposed to do-- provide an open airiness while holding the scene together. Doesn't this look as though it's floating??? Bravo!
Lara decided to make her Wrought Iron Cross using two different yet similar colored sheets of glass. Here's the kicker-- aside from the four pieces that make up the blue diamond in the center the other pieces of blue come from the same sheet of glass that the rest of the cross was cut from. Lara carefully positioned each pattern piece on the various colors that made up the multicolored sheet of glass that she picked for this cross. Her careful planning makes this look incredible.
Linda F managed to get her first LSU Plaque finished. All it needed was some channel around the edges. I think the simple tweaks that we made on this pattern elevate it from nice to wonderful (as well as being completely steadfast.) Of course, Linda's workmanship also factors greatly into its awesomeness!
Let has been a busy woman! Her Owl and her Sunflower Heart are amazing pieces of work especially when you take into consideration just how new she is to the stained glass game. The all too common problem of a ragged edged heart was completely avoided by Let as she ground and aligned each piece to fit perfectly together.
Robert began a new Door Insert this week and he's well on his way now that the design has been drawn up and his bevels are wrapped. I always insist that a bevel border be tacked together before doing any other work on the window so the rest of the pieces can be ground to fit within the framework of the bevels. It may sound like you're working backwards but things just fit together so much more perfectly when you use this method. There's nothing worse than looking at a window with a beveled border that doesn't line up correctly.
Betty has got three Rosebud panels coming together. She's already got two of them ground with the third one being very near to completion. She also has her border pieces cut into strips and if she can get these three windows wrapped in foil and get the front sides soldered I think she'll easily have these completed upon her return next week.
Martha has really stepped up her game because she seems to come in with a new window just about each week. This butterfly is ready to be foiled and soldered when she comes back in and this is only the first time we're seeing it! The reason she was able to grind this so quickly was because her cutting was so exact. Careful cutting may take a little more time to get your pieces all cut out but it speeds up the grinding process so much that you actually end up saving time.
With both sides soldered on her Peacock Window Mary Grace is very close to washing and coloring this. The only thing left to do is add the channel that will surround the window and replace the one piece of glass that was accidentally cut from the wrong color. She's already got the bad piece knocked out so I know we'll see this completed upon her return.
Mary likes her Hummingbird and Flower Panel so much that she's going to put a second one together right after she finishes this one. She got her background and border cut out this week and then even got it all tacked together which means that this is very close to being finished. Expect to see another one of these being cut out real soon now.
Cheryl's Birdhouse is also well under construction as she completed the front and back of the house and then moved along to cutting and grinding the brown pieces of glass that make up the roof of the bird house. The roof will be very interesting because it's made up of six overlapping slats (three per side) that have been wrapped in scalloped foil. We'll show you just what that will look like when you see this again next week.
June got her large Rooster Suncatcher completely ground and has moved along to the foiling phase of its creation. She's taken it home so she can wrap it before she comes back in and therefore hopefully get this completed upon her return. It will be close but as long as it's wrapped in foil when she walks in the door, I think that she can do it.
It's very hard to see that Fractures and Streamers glass that Susan D is using for the background of her Fall Window but it's there. The colors in the F&S glass are perfect for this 'fall' application and I think we'll see the opened areas in the center of this window filled in when Susan returns next week.
With the front and back side of his Shrimp De Lis Window soldered all Kerry has left to do is add a channel and a little wire work that will really set these shrimp off. Look out because the end is near!
Wow, is Annette's Transom Window is really coming together now or what? There are just 6 pieces of background left to cut and then she'll move along to begin work on the two borders that will finish this off. We all know how quickly borders go so this I think it's safe to say that this window is nearly finished.
The crab may not look like much right now but Linda L's Beach Scene has come alive with color now that the crab has been cut into the sand. It still needs some eyes painted on it to really finish it off but that will easily happen next week. This appears to be another window that will be completed when we next see it..
And last but not least is another Hexagon Window that MiMi has all ground and fitted together. This even has two rows wrapped in copper foil already! These are really flying off of the 'press' quickly now so before you know it MiMi will be cutting curves again.
And there you have it. There's been a lot of excellent work done this week and I hope this post showcased it well.








.png)