
Next we've slid the blue lines a little further away from the center of the window which removes the small problematic pieces that we encountered in the first drawing. However, we now have four small pieces (although slightly bigger than the first ones) along with points coming off of the bottom of the Fleur De Lis that will need lead lines running from them.

Finally, we have some great line placement. All the pieces are of an easily workable size and extra lead lines aren't needed for the bottom legs of the Fleur De Lis. All of this should be worked out BEFORE any glass is cut which is to say, don't start cutting glass until you have a pattern drawn on paper. It's the only way to ensure that you won't need to work harder than necessary. Make sure you scroll further on down to see what this pattern looks like when it's actually cut out of glass.

So let's get into this weeks windows. Angie completed this Cross/Rose/Heart Panel and as soon as I saw it hanging I said that I have to make one for the next show we do. Her glass choices are perfection and the pattern has already been scanned and handed out to four different people! This one's a winner for sure.

Becky S put the finishing touches on her second Butterfly Lawn Ornament and it's turned out to be just as nice as the first one that she made. I'll say it again: The addition of a body in the center really adds so much to these!

Cindy is on a roll making these small circular Flower Suncatchers. They measure about 5.5 inches in diameter and this is one of two that she completed this week. The center sections come from a broken lamp that was beyond repair but she's cut the six painted panels into circles and is bordering them with blue glass. Now that she's got two of them completed the rest will go quickly for her.

Here's a look at a small Peacock Panel that I made. These have always been popular through the years and the are great 'attention getters' at shows. Planning ahead, my next one will have a more amber color scheme.

As a sort of 'bonus' this week we take another look at two of the windows that MiMi has made now that they've been installed. They certainly brighten up the room, that's for sure! And don't you agree that the similar images look better than mirror images? The matching color schemes and identical sizes are all these windows need to pair them together.

Carol began working on two Mardi Gras Masks and as you can see she's almost got both of them ground already. Once the eyes are cut into these you'll really see the masks in all of their Mardi Gras glory!

Betty's project may look a little familiar to you because it was the example used in the tip at the start of this post. This panel uses 5 different types of glass including a Fleur De Lis Bevel cluster. Look to see this completed when Betty returns.


Jeff started his first project this week and the only thing that he has left to do with this is to add a border! This panel will be just in a 12 piece set which will fill in one of the openings of a three by four window. We will reveal what the other panels look like in the weeks to come.

Jeanne M has all 29 pieces cut out for her Geometric Window! This is her first project and believe it or not this was accomplished in just one class. I guess you can say that she's focused. In fact, she's all set to begin grinding already!

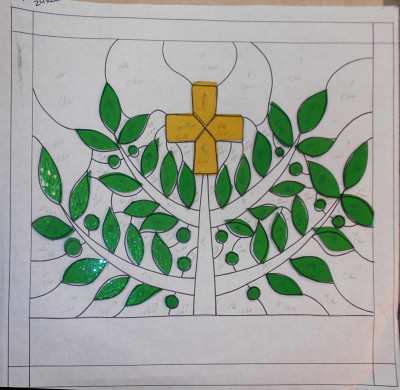
Kerry, like his wife Jeanne M, also managed to cut out all of the glass for his Cross Window in just one class session. He's already begun to grind his glass and I'm sure he'll finish the rest when he comes back in. It would appear that our new students are unstoppable!

Lara's Wedding Box isn't starting to take shape-- it HAS taken shape! Her colors are vibrant without being too splashy and her choice of Baroque Glass for the border is as elegant as can be. This will surely be completed next week as she only has to assemble the box bottom which is only 5 pieces of glass. Gorgeous indeed.

And speaking of gorgeous, just look at Susan R's 1920's Woman. This week we see that the pearl necklace has been cut into place along with all of the background glass. I can't wait to see what Susan decides to do for a border on this. I was already loving it but those pearls just added so much to this design!

Roxane is symbolizing family through the use of Penguins in her newest window and it's already shaping up to become something new and striking. I believe that these are the first penguins we've ever seen done in class but according to Roxane they will certainly not be the last ones!

I jokingly took 13 pictures of Susan D's Cactus Nightlight and would you believe that not one of them came out either blurry or overexposed! I've adjusted this one as best I could and although I think you can get the picture as to what her nightlight will look like I'll be sure to get a GREAT picture of it next week. Even the angle is off on this picture. :-(

Flags are in (as you're about to find out.) Here you can see Tracey's Eagle/Flag Window which was practically all cut out in one class . The only reason the few remaining brown pieces aren't cut is because Tracey left that glass at home. She'll be grinding this before she knows it!

Next we have Shelley's American Flag/Peace Sign window. Shelley has never made a round window before and this is going to be a good one to start with. Leaving it round helps to 'flesh out' the peace sign so I advised her NOT to square it off. Shelley hopes to enamel the stars onto the blue glass to avoid all of the lead lines that cutting would create, but since the blue is dark I don't feel that the lead lines would be distracting to the window at all.

Our last window involving a flag is being made by Mary Grace. As you can see it is VERY similar in appearance to the window that Tracey is working on with the big difference being that this one has numerous clear stars sprinkled throughout the design. You'll see those better when this is completed and hanging up.

Rowena worked on this clear textured Fish Suncatcher and all it needs is a little solder to finish it off. She cut it, ground it, and wrapped it all in one three hour class. I need to hire this woman!

Let's face it, sometimes it's hard to tell what a project is before it's ground but Mary's Rose Window already looks exactly like a rose and she hasn't even begun grinding it yet. This is one of those windows where Mary will grind the flower and tack it together before cutting any of the background glass. Once the flower has been assembled she'll trace it onto a single piece of glass which she'll cut out and have fitting together instantly.

Wow, isn't Patrice's Ragin' Cajuns Window looking great! What I like best about this is that Patrice isn't afraid to challenge herself with each new project. Then she just stands her ground and whips the glass pieces into perfect shape as though she's bending them to her very will! I can't wait to see this with some light behind it.

And here's Terry's 2 Panels that make up her Spiraling Flowers Window. Since the size has changed since she began this project she'll be adding a row of diamonds across the top of the upper section and across the bottom of the lower section. We'll see how that looks when Terry returns.

Brenda's Salon Window is all cut and ground and ready to be wrapped. She's already made some progress on the foiling process while she was in class and before you know it, this will be a finished piece of art.

Sheri's Poppy Window is nearly finished serving time on the work table as it's about to blossom into a window that hangs in the sunlight. With all of her class cut out and just the border needing to be tacked together, this will be completed before you know it.

Linda F's Flower Basket is all wrapped and ready to be tacked together. She was hoping that she could get that done at home but the near freezing temperatures we've been experiencing probably put the kibosh[1] on that idea. Nonetheless, you'll be seeing this tacked together when you next see it posted here because we'll easily get that done during class when Linda returns.

With all of the glass officially cut for her Industrial Fleur De Lis Window, MiMi is ready to begin soldering the back side of this impressive Window. The end is near and I suspect that a VERY large smile will be on MiMi's face when she completes this.

Jeannette's Compass Rose Window is so close to being finished that it must have hurt her to walk out the door with only a small amount left to go on it. The good news is that she'll have this completed during her next class and she'll be able to take her time washing it and coloring it.

Martha finished everything but the soldering on her Pair Of Cardinals Window and they look great. She plans on soldering this at home during the week between classes so this may very well be completed when she comes back in.

Barbara is grinding away at her Santa Claus Window and although you can't really see it, there's actually been a lot of work done on this. The problem is that all of her white snow looks like the white pattern paper so you can't see all of her work-- or at least not yet.

And to wrap things up we leave you with a look at Martha's latest creation, a Butterfly Lawn Ornament. She did a wonderful job cutting this out and I know this will go quickly for her.

Lastly, no one has head lice! You just had to be there...
[1] Many words in English have obscure origins, particularly those that first appeared in argot, cant or slang. None is more mysterious than kibosh, which is most commonly encountered in the phrase to put the kibosh on something, to finish something off, put an end to it, decisively dispose of it, or reject it.
Paul
Bayou Salé GlassWorks
No comments:
Post a Comment