Don't jump to conclusions. I see this happen all the time and it's generally the cause of difficulty. There are some shapes that we see in stained glass that cause students problems only because they don't correctly orientate them. Triangles are the most common of these shapes and curved parallelograms are probably the second most common. Most times these are not perfect and are 'off' in one way or another. People cut the glass piece and then drop it onto their pattern without spinning the piece around to see if there's a better fit in another direction. If you jump to conclusions and just begin grinding you can very easily end up with a piece that's too small and still doesn't fit correctly.
The two blue triangles below are the exact same piece just rotated a bit. Note that one of the points is longer than the other two. Most people miss this or believe that they've cut the piece badly and then grind the long point down so it will fit the pattern-- that's wrong. Any time you have a triangular shape you should spin it to see which way matches the pattern most closely. The green curved diamond is another example. This piece will only correctly fit in one direction even though you can force it incorrectly into place if you have it upside down.

In short, rotate your pieces for the best fit BEFORE you begin grinding. You'll find that in most cases you'll actually end up grinding less to get a better fit and that's always a good thing!
Let's go! Linda F's Gingerbread house was completed this week and Oh boy, could I bite into that! The Gingerbread man's face was painted on using white glass paint and the chimney was cut out using a method that we will delve into next week as our tip. Gumdrops, cookies, candy canes, and icing! What else could you want?
Melissa's Calico Cats Window really shows how colors can help create a feel. That water just looks so very peaceful and although I was initially against it at first I have to say that I was wrong about this not needing a border. The darker Blue/Green combination really frames this out perfectly and draws the viewer deeper into the scene.
Linda L took no shortcuts on her Wooden Cross and Flag Window. She had the option of adding a lead line at the top of both arms of the cross to make things easier for her but those lines would have broken up the stripes. She opted to grind out some right angles which really sets the cross into the flag. Notice how the bottom of the arms just happen to rest on the lines of the stripes-- this was done purposefully to help avoid extra lead lines but it wasn't possible to do the same on the top. That's why we made sure that the right angle cuts were possible without being too difficult. That's what stained glass pattern designing is all about.
A little Photoshopping shows what the window would have looked like had Linda added the lead lines. It's certainly still very beautiful but which one would you rather own given the choice? Little things count (even if only a little).
This week Shawn turned this oversized Minnie Mouse Suncatcher into a complete window. She thought about 'squaring' it out in black glass but in the end went with a wispy black glass (which photographed more blue for some reason) and then finished it off with a different clear textured border. Voila, one wonderful mouse window!
Angie's Peacock Hand Mirror is beautiful even without a reflection in it. I have to say that I do like the design of this. There's no doubt as to what the bird is and the large mirror makes it extremely functional. This one is done to perfection complete with a lead drop eyeball.
Shelley's large Cat In The Moon Suncatcher is supposed to be a Siamese Cat and for all intents and purposes I'd say that she's nailed it! I changed the pattern a bit to allow for a more secure hook placement and I told her that I'd have to make an educated guess as to where the split on top of the moon should go to make it hang straight. Talk about luck, when we attached the hook and put this in the window it hung perfectly on the very first shot!
I do believe that Jan has achieved Christmas Nirvana now that her Santa Window has been completed. This Santa looks as though he's got a lot of presents in that over stuffed sac he's carrying. I hope he doesn't end up with back problems.
Annette really got her Old Rugged Cross whipped into shape quickly enough. Notice the subtle shading that she used in the browns which helps create that 3D appearance. Wonderful.
For our final completed projects we have two different Sunflower Hearts. Here's the first one done in soft colors which Cindy made...
...and here's Martha's bolder colored version. They may be two completely different color schemes but the end results are two completely beautiful Sunflower Hearts.
So then, first up in our newly started projects is Jeannette's latest Heron Window. It'll be fairly large and framed out with a double border when it's completed. I can't wait to see what she decides to use for her background glass.
As you may recall Kerry is making a Hummingbird and Fuchsia Window. When he came in this week he asked if he could use bevels to border the window and this was the perfect time to mention it. Beveled borders must be assembled before any background glass is cut because bevels only come in certain sizes. If a window isn't specifically drawn to fit within a bevel border then you just can't do it. Kerry has his bevels wrapped as well as his leaves, flower and bird. Next week he'll get his background cut out to the longer size that the bevels dictated this window to be.
Judy M swam through buckets of blood (hers and my own) to finish cutting out her Scales Of Justice Window. This is impressive for a new student to cut out their second window so quickly. She probably could have been done sooner had it not been for all the cuts that the razor sharp corteza glass caused. Next week she'll be grinding and I'll show her how to remove most of those glass shards before she even get to the grinder.
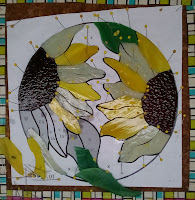
Mary Grace has started a trend. When she showed me the Sunflower that she planned on making I told her she'd need a metal hoop. She brought the hoops in and everyone went wild when they saw them. Now everyone has a hoop or two and patterns of all different varieties. Here we see Mary Grace hard at work on her first Sunflower Hoop. She's about halfway to the finish line now.
Cindy's large Butterfly Suncatcher has all of the decorative globs ground into place and she's just about ready to begin soldering this exquisite piece. There are a lot of pieces in this project and they all add up to one impressive piece of stained glass.
Susan R has a thing for freestanding bird decorations and since she's able to make them herself she's in luck because she can easily have as many as she wants! This is her latest pattern and I think it's going to look great (as did her previous 3D Birds).
This colorful Owl is an old favorite that Linda F loves to do because it not only looks fantastic but it also uses up all that scrap glass that's too big to throw away but too small to make a window out of. She's got it all cut out already and has even begun grinding it. Next week I'll show her a secret to make the eyes fit together far easier. It may be a little late but I thought about it when she said that once the eyes are ground the rest will go quickly.
With only 11 pieces of sky left to cut out, Mr. Bingle is looking magnificent. I just wish you could get an idea as to how large Cheryl's window is. Next week I'll put a dollar bill on it to give it some scale. I must say that I'm very impressed with Cheryl's cutting on this. You'd almost swear that Mr. Bingle was ground already!
Tracey had to pick out a color for her border this week and after sifting through numerous pieces of glass she decided on a sheet of green glass which was slightly different from the glass that she had used for her leaves. They may look the same while the window is resting on the table but when this is lit up (and it will be soon enough) you'll easily see a subtle distinction between the two that really sets the entire window off.
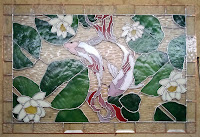
Sheri put the final touches on the soldering of her Koi Fish Window and only needs some channel on it to finish it off. When you see this next week it will be lit up and Sheri will be working on another project.
Lisa worked hard and long on her Script V Monogram Window and when she walked out the door with it the only thing left to do was to solder the back side. Knowing Lisa it may already be completed by the time you are reading this. She doesn't waste time and she loves to work on her projects while at home so this will either be completed when she walks back in the door or completed before she walks back out the door. Either way it WILL be completed!
With all five of her buildings completed and tacked together Lara is ready to begin the skyline. Although it will be difficult we are going to attempt to use the glass saw and cut the sky out of one large piece of blue glass. If we succeed (and I believe we will) it will be the proverbial icing on the cake of this cityscape.
What's trending? Sunflowers! Here's a look at the Open Air Sunflower Hoop that Betty has begun. She's using a mixture of yellows in her version and it's coming together wonderfully. Look at that grinding. Do you see the black lines of the pattern surrounding each piece? That's PERFECT grinding and fitting!
With all of her soldering completed all Mary needs to do is add a channel to her Holy Ghost Window and then wash and color it. I must confess that we lifted it and even though it's currently a fluxy mess it looks stunning! I can't wait until YOU see this with some light behind it next week.
Next we take a look at Bee's latest Box. She's got this all together on her own which means that she'll be graduating from box school soon! Once you get a few hinges attached they become very easy. of course the trick is all in getting those first few on. I have no doubt that Bee will rise to the occasion.
MiMi's love for Hexagons is NOT abating and I won't be surprised to hear her tell me that she's having dreams about making these windows. The fact is that I've had it happen to me when I make something over and over. Rest assured that I will share a finished view of the room itself when all of these are completed and in place.
With her three layer wrapping border all cut and tacked into place Ann will be able to relax while soldering her large Cross Window. Every class we have has mentioned this window and asked to see it and one student has even expressed a desire to make one herself so perhaps we'll see this done again in the future. Sometimes a fancy border can outshine the subject matter and this is a border that's capable of doing so, but the cross itself is even more intricate than the border and therefor stands out in the mix.
Barbara achieved quite a lot in her class as she kept grinding away at all of the tiny pieces that make up her Small Iris Panel. This week you can easily get a feel for what this will look like as all but 3 pieces have been ground and fitted together.
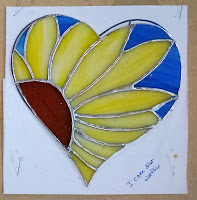
Angie is WELL underway on a Sunflower Heart of her own as she has this one almost half way soldered already. I love seeing the different colors that people chose for this pattern. Yes, it's always yellow, blue and brown but the palette to chose from is vast.
Who says Christmas is over? Susan D has eight more Beveled ornaments well under way which means that there will be no Christmas rush for her in 2021. The top six will be just as you see them- colored glass surrounding a single round bevel. The bottom two are made of scraps that don't match because only the bevel itself will remain visible after the mismatched glass is covered with foil and then encased in carbonite lead.
So there you have it. It was certainly a busy week and next week I know that we'll see at least three more stunning windows become completed. I'm just happy they didn't get finished this week because things were getting a bit jam packed in this post!
Paul
Bayou Salé GlassWorks


No comments:
Post a Comment