Monday, February 17, 2020

Pop Goes The Weasel

Aspect ratio.  Sometimes it's hard to understand but in its simplest terms it's all about an image retaining it's composition when it is resized.  Let's start with the fish pattern below where it's easy to see that the image is wider than it is tall.   When redrawing this pattern to fit a different size it will only maintain its aspect ratio if the finished size scales either up or down closely to what the original pattern started as.


Here's the same pattern when it's scaled to twice as high as it is wide.  Do you see all of that empty white space above and below the fish?   That undefined area is a result of the image not being able to be scaled entirely to the new size.  This is what happens when you try to put a pattern that is wider than it is taller into a space that is taller than it is wider.  The same occurs if you try to resize it in the other direction but in that case the large white areas would be on the sides rather than the top and bottom.


If we were to make the original image fit the new size exactly then everything in the pattern would lose its height and width ratio thus stretching it out of shape like below.  Now the fish aren't long-- they're kind of square!


Without redrawing new scenery for the top and the bottom of the image, the only way to make it fit our new dimensions and make it look un-stretched is to cut out some of the pattern on both sides as follows.   Sadly, we lose a lot of what made the window look so good in the first place if we do that.


So when you are choosing a pattern that has to fit a certain size be sure that the pattern matches in terms of length and width otherwise you'll be changing the overall design of the pattern in a big way.  We crop things almost every day in life because aspect rations don't always line up with what we have available to us.


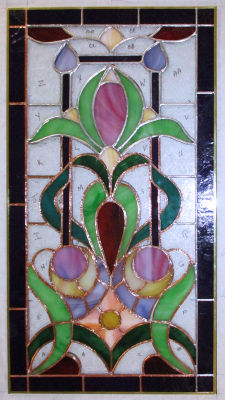
Now I must say that I knew that the colors of Lara's Victorian Design Window would set this project off spectacularly but when it was lit up even I was surprised at just how vibrant this window is without being overpowering.  There are plenty of times when bright colors translates to too much, but not in this case at all!  I've seen this window made twice and I've been impressed both times.


Shawn's Sunflower was completed this week although and although she wasn't able to get it colored before she left class, I did that for her the next day.   I just couldn't wait to see what this looked like with some light behind it!  And my verdict is that this is something that she should really be proud of.  Firing the sheet music for 'Here Comes the Sun' onto the glass really makes this window special along with the initials in the bottom corner.   In case I haven't mentioned it before this is a tribute window and all of the pieces of the subject matter represent a life.  This will surely touch more than a few hearts when Shawn delivers it.


We have a new Cross Suncatcher to unveil this week and although I don't know where Carol found the inspiration for the design I'm pretty sure that other people are going to want to make this.   It's fancy without being overwhelming and the colors that Carol picked for it accentuates the design perfectly.


Lisa made her Butterfly Suncatcher last week and when she came in this week she was eager to start work on a 'real' window.  She's chosen an Owl and all I can say is that I'm thoroughly impressed with her glass cutting abilities!  After tracing out her pattern onto poster board and cutting it into its individual pieces Lisa then began tracing those patterns onto her glass and then cutting the glass itsilf.   She's texted me a few times during the week so I know that she's working quickly on this.  I can't wait to see how much she has cut out when she comes back in!


Belinda now has all of the glass cut out for her church window and after getting the first clear border cut, ground, and tacked into place she moved along to the final green outer border.   Once that's wrapped she can attach it and then begin soldering this window!


Cindy's been busy cutting and grinding two Rooster Suncatchers and all I can say is that the glass that she's going to be using on this will be spectacular.   I never worry too much about my glass choices but sometimes you see a certain piece of glass and just know that it's just perfect for what you have in mind.


Now here's a complex project that's really coming together quickly.   Linda F's Underwater scene is not only all cut out but more than halfway ground as well!  I thought that this might take her some time to finish but I was obviously wrong on that count.  This is looking good, without a doubt.


With the center of her Coffee Cup Window all tacked together Angie was able to cut out a border and get it almost entirely tacked before calling it a day.   She wastes no time at all and there's proof of that in the picture itself because that missing piece of border that you see on the right side was in Angie's hand getting foiled when I took the picture.  She was intent on getting this done!


Next up we have one of two different renditions of our ever popular Stylized Fleur De Lis window.  the first one here is being made by Betty and she's all ready to begin grinding this window.


This second Fleur De Lis Window is being made by Rowena who got hers all tacked together and then 'borderized'.  I have a sneaking suspicion that this will be finished when we next see it again.


There are only a few pieces of background left to go in Susan R's Seafood Window before she can start soldering this.   It's been a long haul but windows that are this complex don't come together very quickly.  Still, the end is in sight now and I know that Susan's painstaking attention to detail is going to pay off in spades in the end.  


Tracey worked on this new Nativity Scene Window at home for the most part but this week she brought it in to get two borders attached.   With her son's wedding having occurred over the weekend I doubt that she'll have time to work on it before her next class but it's still very to close to completion already.


Jeanne M had to deal with a migraine while she was in class but that didn't stop her from getting all of her large Easter Window cut out and ready for some work at the grinder.   For the record, I'm going to try to talk her into a double border on this because the clear background that she's used will really look great with two borders.


Annette was busy soldering her Max the Dog window and I think that there's a distinct chance that this will be among our completed windows when we return next week.   I can't wait to see this all washed up with some light behind it because as cute as it looks now, well, it's just going to look even better after a bath!


Kerry finished grinding the last few pieces of his Deer Window and then even managed to get it all wrapped before he called it a night.  This will easily be tacked and bordered when Kerry comes back in.


Susan D 's Dog Window is certainly taking shape quickly.   In previous pictures all of the fur that makes up Ali the dog wasn't yet ground while this week's  picture shows only glass that HAS been ground.   As you can see, there's not much left to go!


Melissa's Peacock Window is sweeping around in a circular motion and she's just about ready to complete the grinding phase of her design--  Well, the tough grinding at any rate.   There is actually a lot of cutting left to go on this window but once this is ground the rest of the cutting will go quickly.   We'll go further in depth about what will transpire to this window in about two weeks or so.


MiMi's Leaf Suncatcher is now officially ready to be tacked together and soldered which means that this will be completed when she returns-- without a doubt!   I just hope that it doesn't fold in half...


And there you have have it.   Everything that was fit to print from our shop during the 3rd week of February.

Paul
Bayou Salé GlassWorks

Monday, February 10, 2020

Did I Hit A Nerve?

Last week I said that we'd discuss how Belinda was going to cut out all of those church slats so quickly and efficiently so here we go.  In the image on the left  you can see that Belinda still has an opening in the center of her church where you can see the pattern underneath the section where she has no glass.  It's hard to see but the pink lines show where the slats will go, but if we cut them with individual pattern pieces there will be a LOT of grinding to do.  Since they are all the same color and cut from the same piece of glass there's a much simpler way to handle this.   First we cut a single piece of glass and grind it so that it fits into the opening.  You can see the white glass in place in the picture on the right--I've outline it with red lines.  The white glass is now covering the pink pattern lines and the window outline so we're ready to begin.


Since the white glass we cut fits into place all we have to do is transfer the lines onto the glass that we just ground and then make straight cuts across being careful not to mix anything up as we separate each piece.  We also have a window that needs to go in the center so we made the window separately, tacked it together, and traced around on the white glass as well.  After removing the piece Belinda cut the horizontal cuts and then she cut the vertical cuts to make room for the yellow window.  Next she lightly skimmed each piece on the grinder to make room for the foil that has to go around each piece.  Finally she wrapped each slat and put it back into position on the pattern as you can see on the right hand image.


Working this way reduced the amount of tedious grinding that she would normally have to do because the glass already fit into place before she started cutting it.  Now Belinda is ready to start tacking this all together!

Here's another example.  I cut the roof (and the shutters) for my Lafitte's Blacksmith shop using the same technique. Bird beaks are a great place to utilize this tip- just cut the beak as one piece, grind it to fit and then snap it in half to make two pieces.   It's so much easier this way!. 


Ok, with that out of the way let's look at our first finished piece this week and that would be MiMi's Heron Window which is absolute perfection.  I feel that the circular shape of the finished window only adds to the attractiveness of the pattern.  Her glass choices are so spot on that someone who saw this posted on Facebook asked what  MiMi used to paint the feathers! Everything about this says perfection.


Wow, Jeannette's Swan Window is nothing short of lovely.   It's calm and peaceful and most importantly, it's exquisitely made!  If no one else makes one of these soon I may just be next in line to do one of these because I think this would sell quickly.


Tracey's Magnolia Window has been getting a lot of attention in all of the other classes with  so many of our students considering making one for themselves.  It's a great design that really lends itself to glass as Tracey has proved here.  This is our second round window this week so I'm guessing that circular windows are back in style.


Mary put the finishing touches on her Sunflower Window and the end result is stunning.   Melissa did one of these sometime last year but Mary made this her own my changing up the colors and the number of borders surrounding it.  I just love it when someone goes against the grain and doesn't take the easy route by following suit.


Lisa is our newest student and that means that we're looking at a Butterfly Suncatcher!  She had no problems whatsoever while making this.  Her cutting and grinding were wonderful so I'm thinking that her first window (an Owl) will look just as great.   We'll see that get started when Lisa walks in the door again next week.


Barbara H made her first curved Bee Lawn Ornament and discovered that these things are more work than meets the eye but also that the end result more than justifies the extra work.   This is the bee's knees! 


Angie resumed cutting out glass for her Coffee Window and ended class with it all cut and ready to be ground.  Thankfully (or luckily?) she picked a piece of glass that cut very easily for all of the curly pieces that make up the steam and spell out the word Coffee.  Things always go better when you have glass that co-operates with you.


Linda F made incredible strides on her Underwater Fish Window and now has it almost entirely cut out save for a handful of pieces that were mislabeled and therefor have to be cut again.  This is shaping up to be one impressive project and Linda is swimming through it with the greatest of ease.


Belinda's Church Window is very nearly completely cut with just the last two pieces of her 'banner' left to cut.   The straight line that comes off of the top of the church and into the sky will be covered by a leaded cross that will look as though it's perched atop the church and we'll get to see that attached next week as well!


Jeannette also began working on her Coffee Pot  Window and she has the table and the pot almost completely cut.  There are only four black pieces left to go on the pot itself and then there's just the background.


We also see that Jeanne M is moving along at a nice steady pace with her large Easter Window.   She's got her eggs cut out now and even started on the Rabbit which I'm sure we'll see pieced together next week.


Susan R has more background cut for her Seafood Window.   This is coming together more and more with each passing week.  This is Susan's tour de force because the both the work and the detail in this window are spectacular.


Mary Grace ran into a problem while making her Anchor Window and this week we began to  apply a work around to fix it.  The problem is that she had run out of glass and ended up one piece short for her border.  After looking around just about everywhere for a matching piece of glass Mary Grace finally had to admit defeat and come to terms with the fact that there simply isn't any more of this glass to be found.   Rather than re-cutting the entire border we've decided to cut the wide border down to half of its width.   That left us with 7 sections that weren't going to be used.  Next we're going to take one of those seven pieces and use it to cut out the now thinner missing piece.   Once they are attached she'll border it one more time with a different amber glass and stagger the breaks like brickwork.  Problem solved!


Kerry's Deer Window is almost completely ground now and I have no doubt that he'll begin wrapping this upon his return.   He moves quicker ad quicker with each passing week and his precision is increasing as well.


Martha has all of her Flowing Window ground now and will begin foiling all of the pieces which will make the design in this pattern much easier to see while it's on the pattern.   We have this picture problem whenever anyone does a window with all clear glass (or a lot of white like in Jeannette's Coffee Pot Window).


Lara got her border cut and attached to this beautiful window that I'm always unsure what to call.  This pattern used to be showcased in an ad for Victorian windows so that's what I call it-- a Victorian Design.   Nonetheless, it IS a beautiful window and Lara is almost finished with it.   One more week ought to do it...


Melissa is now past the halfway point on her Peacock Tail Window and things are taking shape more and more with each passing class.  There are a LOT of pieces in this but Melissa is taking it one piece at a time and winning the race by not rushing.  It won't be long before she looks back on making this as a memory.


With the bowl of her Fruit Bowl all cut and ground, Jeanne L is contemplating wrapping and tacking together those pieces.   Since we usually (always!) cut the background for this design from one piece of glass the idea of tacking it together is a sound one indeed (and what I'd recommend doing). The next time you see this you may find that the bowl is much easier to see on the black and white pattern than it is this week.


Jeff worked on tweaking the solder on his Flower Scenery Window and is so very close to being finished that it isn't even funny.   This window is entirely his own effort as he's accepted only the leanest, barest,  minimum amount of help from me on this project.  And because of that, Jeff has learned so very much.


MiMi also began this leaf suncatcher that she cut out after completing her Heron Window.   This will easily be finished before you know it!


Always busy, Jeannette also has this Cardinal Suncatcher in the works and it just needs to be ground and wrapped.  This pattern is quick work for Jeannette.


Cindy has begun making two medium sized Rooster Suncatchers and also worked on separating three birds from a window she made a while back that she's unhappy with.  It took most of the night but the birds have been freed and next week we'll see what we can do about redrawing a pattern around them.


And there you have it.  All the news that's fit to print!

Paul

Monday, February 3, 2020

Two Little Round Wet Things

You're only as good as your tools are.   I have about 7 pairs of running pliers available to me at any given time but I always go for one pair in particular.  That is because I go out of my way to oil them regularly and loosen them up.   When it comes to running pliers you want them to open nice and easily so that you can precisely adjust the pressure that they put on the glass when you squeeze them.  If your running pliers (or even your breaking pliers) are tight and hard to open and close then you need to oil them now.   Both are oiled the same way: Hold the pliers so that the gripping end faces upward and open them as wide as possible.   Put a drop of oil on them where the green arrow on the left shows.  Turn the pliers upside down and place the oil where the second green arrow on the right indicates.   Next open and close your pliers a good number of times to allow the oil to penetrate.  Do this weekly and when your pliers open and close effortlessly you'll thank me.  :-)


This week Angie completed her Easter Lily Window in record time even though she was unable to work on it during the week while at home.  With each project Angie gets faster and faster as well as more and more accurate with her cutting and grinding.   The proof as they say, is in the pudding (whatever that means).


Jan finished her Red Fish Window and there's no doubting what kind of fish it is.   Working small isn't easy and this window isn't even 12 inches wide so there was a lot of tiny, detailed pieces throughout  but Jan pushed through the pain and made it look great.


Rowena's Mardi Gras Mask Window captures the festivity of Fat Tuesday perfectly.  And speaking of perfect, just look at all of those little round pieces that form the beads in the necklace that drapes over the mask.   Rowena's attention to detail and exactness is what makes this window look so great.


Betty finished working on two more Suncatchers that both involved wire work.   She's developed quite a skill for wire bending as you can see in her completed projects.  I personally love the flower and may have to make a few of these myself.


Cindy started this Love Panel just last week and literally wrapped it up this week.   People always get confused about the letters in the glass and how they are formed but they are simply cuts in the glass.  In this case the lead lines were curved to spell out the work LOVE.


Kerry finished cutting out his Deer Window and moved on over to the grinder while he was in class.   Working from the bottom up he's already got the chest and lower part of the Deer's face looking great. 


Jeannette filled in the few missing pieces for her Swan Window and then worked on a border for it.   The green that she picked manages to balance a brightness with a softness that frames out this lovely design.   Before the day was done Jeannette had her front side soldered and is now ready to work on the back side of her window.


As you can see, Susan D got her Ali Dog cut out and WOW! does she look spectacular or what?  Her shading is spot on and the face looks fantastic.   If you're wondering where Ali's back legs are don't worry -- Ali is actually sitting on a sofa with her front legs hanging off and that will become apparent once Susan begins working on the background.


Jeanne M started cutting on her Easter Window and although it's difficult to see, her clear antique background is all cut out.  Expect to see more pastel colors added to this when Jeanne comes back in.


Annette got her Max The Dog Christmas Window tacked together and then had to decide what she'd do for a border.   Since this was made to match the size of her Grinch Window she's decided to use the same two border colors but she's reversing them so that the blue border doesn't touch the blue sky.  That means her inner border (as you can see) is green.


Belinda cut the slats for 2 of the 3 sides of her Church window and even got them wrapped and tacked into place.  This window is very near being completed and I'm thinking that she'll have all but the border tacked together when we next see this.  Next week we'll go over just how she did this all so quickly in our starting tip of the week.


Martha worked diligently grinding her Flowing Textures design and it's fitting together like a glove.  It won't be long before she starts wrapping these and then you'll really see what the design looks like.   Me, I'm thinking she should use black backed foil  because black patina works so well with clear windows.


Jeff  finished soldering the second side of his window and is now just touching up some of the soldering.  I suspect that he'll have this completed upon his return when we'll see this in all of it's beauty.


Shawn  finished soldering the front of her Sunflower Window and then flipped it over to do the same to its back side.   All the while she was soldering I kept hearing her say that she was doing terribly but you know what?  She was wrong because it looks wonderful to me.


Mary, like Shawn, got the front side of her own Sunflower Window soldered as well.   She also moved on to the back of her window so it looks like we're going to see two sunflower windows finished at pretty much the same time.


Tracey  came in with the green glass pieces for her missing leaf cut out and then after grinding them to fit she tacked them into place and set upon cutting and grinding her 8 border pieces.   She wanted to use a green glass and in the end she settle on a cathedral (monochromatic) clear green.   It looks very dark on the table but just wait until you see this with some light behind it.


Mary Grace is shy one (big) piece of glass for her Anchor Window so while she's waiting for it to turn up she's moved along to this Cardinal Suncatcher.  She got it all cut and ground while in class and is ready to wrap and solder this now.


Melissa added more feathers to her cap, so to speak, by grinding even more tail feather sections.   Once this is all ground she'll still be separating sections the way that Belinda did in her Church Window.  This project is certainly going to be Melissa's Piece de Resistance


Susan R has almost all of the first section of background pieces ground for her Seafood window.  Once they are wrapped and tacked into place she'll carefully slide another piece under her window and start the process over again.


Lastly, Linda F began working on an underwater fish scene and after she traced out her pattern she began cutting glass.   It has many, MANY pieces so she's only cutting out her paper pattern a section at a time to help keep things organized.  Alas, I have no proof of this but will show you what she's making when we return next week.

Paul
Bayou Salé GlassWorks