Monday, June 8, 2020

I Think I'm in Trouble


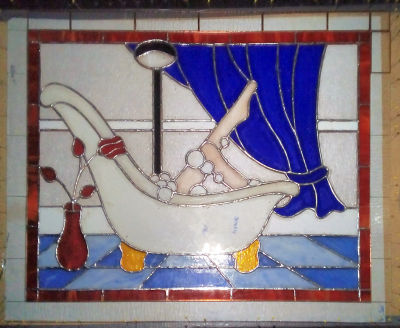
Belinda's Woman in a Bathtub Window is surely stunning.  Everything from the blue drapes which match the blue tile flooring to the iridised bubbles makes this window an exercise in perfection.  Belinda will next be working on an oval Iris Window and also a circular version of Birds On A Wire as well!


This fashionable Woman was made by Jeannette over the course of one week and if you want to talk about a stylish window, then this is it.  The nose and lips were painted on the glass to give it a little more detail but in all honesty if they weren't there it wouldn't affect the overall feel of this window.


Trouble the Cat is ready for hanging and Susan D did another wonderful job not only working on the window itself but designing it as well.  When it comes to stained glass Susan is branching out in wonderful ways.


Lara made this new Feather Suncatcher utilizing nothing but clear scrap glass.  For a bit of a 'kicker' she interspersed some iridescent glass as well and ended up with a beautiful suncatcher.


Linda F completed another multicolored Owl and like her first one, this is also wonderfully inventive. She literally flew through the construction of this and managed to use a lot of scrap glass in the process all the while learning that color placement, in something 'random' like this, really don't make or break the project.


Next up are four babies, two boys and two girls, that our other Linda completed this week.   Her work is so precise that the two pairs are identical so I only pictured two of them but rest assured that they look identical.


Pairs are the way to go as you see here.   MiMi made two more Bird Suncatchers and it's always a testament to the artist when they can create essentially indistinguishable copies of a project, and that's just what MiMi did.


And we end our finished projects with a similar but not identical pair of suncatchers that Betty made this week.  First she has Mary, Joseph and the baby Jesus and then she has just Mary and Jesus.  The thing is, these don't need any identification as they speak for themselves.


Annette was back in action this week and she completed the grinding process of her Cross/Dove Window.  Before class was over with she managed to get quite few pieces wrapped as well.   This window is almost done!


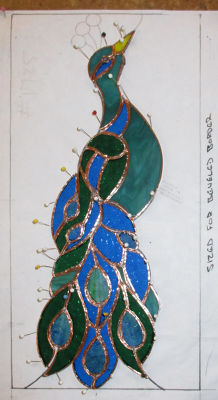
Angie got the background cut out for her Peacock Window and then got the two borders and a channel attached as well.  That's what I call progress!  Expect to see this completed when we return.  


Linda L also worked on a Butterfly Window this week and although it's hard to see, those pins can should tell you that all of the background glass has been cut as well.  The grey that she used for her background blends into the paper pattern but it's there and fitting together nicely.


Lara, after completing her feather, also traced out and cut the leaves for her new Flower Window.  This is window two of a set of three and as you can see this one will go VERY quickly for her. 


Shawn decided to add one more border to her Address Window and the end result is spectacular.   Surrounding the bevels with the same red that she used for the numbers really framed this out nicely.   There's a good chance she could finish this upon her return.


With her border now attached Cindy has officially finished cutting and grinding her Sunrise Window.  She's all ready to solder this now and that won't take her long at all. I really love the look of this very tall window. 


Linda L also began cutting out 4 Bird suncatchers while she was in and she's moving along at a break neck pace as you can see for yourself.   These will be completed before you know it.


Mary Grace began work on a Votive which means that her four sides will need be be assembled in a jig for them to fit together to form a 3D candle holder.  She has all four sides cut out and two of them ground as well.  there's a very good chance that she'll be wrapping these when she comes back in.  


Shelly's Titus Inspired Woman is really taking shape already.  She forgot the glass she wanted to use for the sunglasses at home so she spent her class time grinding what she could.  It's really coming together quickly and it's fitting together wonderfully as well!


Tracey got her border cut and ground for her Sunflower Panel and then she went to work on wrapping all of her pieces.   Normally we tack the center of the window together before cutting the border but this isn't the case if you have rounded corners because the borders can't be cut on a strip cutter.  


Martha's Franklin, LA Street Lamp Window got its final border cut and even though it isn't finished yet it's been sold already!   Martha's so happy about it that she's going to maker a second similar window but the next one will be made in shades of blue rather than green.


Kerry tacked together the top Tiger Face section of his LSU Window and then cut and ground the letters for the bottom portion of this window as well.  Not bad at all. 


Jeannette started and completely cut out another Bee Suncatcher but this one will be using clear glass globs for the Bee's eyes.  These are so nice I'm going to have to make a few for my next show.


With all her glass attached Susan R has begun the arduous task of soldering this massive window.  As I always say, 'slow and steady wins the race' and when it comes to soldering you just can't rush things or it looks terrible.  We don't have to worry about that with Susan though because she always does a good job with a soldering iron.


Lastly we look at the pattern for the Angel that Roxane has begun working on this week.   As she cut out all of her pattern pieces we kept hearing people saying, "That's a LOT of tiny pieces in that  Angel".   Although that's true I have no doubt that Roxane can handle this with ease.


And that's what happened in our classes during the first week of June.  Attendance is really picking up with just Thursday morning lacking in attendance.  All things in time though! Hopefully we'll see some Thursday morning faces in the week to come.

Paul
Bayou Salé GlassWorks

Monday, June 1, 2020

If You Get It In Mexico It's Yellow

It's tip time!  I see so many many people rushing when cutting up or tracing out their patterns and then they say they'll fix it at the grinder. Sadly the grinder doesn't work that way so please take your time.   If you start out with a pattern piece of the 'circle' on the left you'll never get it to look like the one on the right.   Sure, you can grind the high spots but grinding will only make the low spots lower.  Take your time-- your pattern pieces determine 90% of what your window will look like.


Lara's Flower window was completed this week and, as I knew from the start, it's a nice bright window now that it's got some light behind it.  Lara pointed out numerous 'flaws' to me, but I think she's done another wonderful job.  Besides, the 'flaws' that we the creators see are always minor at best and yes, ALL of my windows have these 'flaws'!  Who makes anything that they are 100% satisfied with??!!


Jeannette's Bayou Scenery Window is almost 3 foot wide so it's a large window.  She was worried about making it any larger by putting on a border but because there are so many lead lines coming out to the edge we were able to skip a border and just surround it with a heavy channel.  Once that was done she washed and colored this Bayou masterpiece.


Roxane's Penguin family was completed and it's nice to see these guys find their way home.  Roxane is so good at making stained glass- I just wish she could be able to get to class more often to exercise those skills!


MiMi made this adorable Rabbit Suncatcher and what else can you say about this cute little thing???  Words fail me!


Bonnie was back and Bonnie accomplished.   When she left class she had this Dragonfly cut, ground and ready to be foiled.  2 days later she came back so I could take this picture of it in its completed state.  She's always been quick and efficient but now she's a trendsetter as well because I had to hand out two of these patterns to the two students who witnessed her make this!


Next up is Mary Grace who is on a Lady Bug Lawn Ornament roll as she knocked out yet another one this week.  She even added more wire filigrees to this one so that the wings could be even fancier.


First up in our projects still under construction we have Susan D's cat who has a name this week: Trouble.  Once she said it I recognized the name but coming up with it on my own, well, I'm old and confused.  Susan got her borders cut and only needs to wrap and attach the final border before we can add some channel and wrap the whole kit and kaboodle up.   This is VERY near completion!


Shelley began working on a Titus Window and got the majority of it cut in just one class.  What is a Titus Window?  Well, it's a window that's based on a painting by an artist named M. Titus!  It's colorful and very avant-garde, don't you think?


Angie came in, cut out, ground, and wrapped a Peacock Window.  Now there's a productive day for you!  She'll tack this and get to the background when she comes back in.  Always a favorite of mine, I may have to make this yet again.


Kerry is back and he resumed his work by standing in from of a grinder for most of the class.  Now he wasn't just 'standing there' because he got the top portion of his Tiger Eyes/LSUall ground.  That means it's ready to be wrapped and then tacked together after which he will cut out the bottom LSU section.


Lisa is moving along at an amazing rate of speed on her Butterfly Window and I saw on Facebook that she has the final top left wing section cut and ground now.  I saw that she was asking whether she should square it off or make it circular.  My opinion is that a circle would look marvelous!  (Not that squaring it off would be bad though.)


With the front side soldered and the back about halfway completed I have no doubt at all that Belinda will be finishing this when she comes back in next week whether she's worked on it at home or not.   This window always gets attention and Belinda's interpretation is turning heads in ALL of our classes.


Jeannette also worked on this Bee Suncatcher after she put the finishing touches on her Bayou Scene Window.   This pattern came with a bevel cluster but I've found that cutting the bee out of regular glass  makes it look even look better than the actual beveled Bee the pattern came with.


Susan R is back and her Seafood Window got its final border attached which means that this window can now get a finished solder bead on it.  The end is near! Since this window is long we also added some Strong Line through the borders to help give it a little more stability.


With everything cut and ground on her Sunrise Window, Cindy is ready to begin foiling all of these pieces.  She started doing that just this week and she's about halfway to the top already.   Next up, a tack job and a border!


Four little Baby Suncatchers are all tacked together and ready to be soldered by Linda L now.    These are perfect Baby Shower gifts and once these are completed Linda will be ready ahead of time for any fun surprises!  We'll easily see these finished upon her return.


Finally there's Martha who finished grinding the background for her Lamp Post Window.  Once she tacked everything together she then got her first border cut out and ground.  She's already picked out the glass for her second border and let me just say that it is perfect, but you'll have to come back next week to see just what it looks like!


We had even more people in our classes this week and next week is the start of June when almost everyone said they'd be returning so we may have a very full blog post when we return.   See you then!

Paul
Bayou Salé GlassWorks

Monday, May 25, 2020

Old Age And Aspirin

This week our tip is simple. The biggest fear that most students have is choosing colors for their project.  The easiest way to sidestep the issue is to simply copy the colors that someone else already used.  That's fine.  If you like a window the colors may very well be a part of the reason you like it.  However, there are times when you can't match glass and that's when people panic.  When it comes to picking colors there are very few rules.  I often hear, "Can I use this glass with this one?" And the answer is almost invariably 'Yes'.  The only real rule is that you don't want to mix translucent (clear) glass with opaque (solid colors) within the same piece of the subject matter.

Now what does that mean?   Simply put if your window consists of a flower, a stem, some leaves, a flower pot, a sky, and some clouds then you don't want to mix a see through pink and a solid pink for the flower petals.  It's fine to mix different shades of pink within the flower but they should all be either translucent or opaque. Mixing the two creates 'holes' in your work and that should generally be avoided.

That said, the sky can be clear glass because it's not part of the flower.  The stem and the leaves should match the glass you used for the flower.  Now the flower pot can be different but most times it will also match the flower.

You can have a solid sky and then go with translucent clouds because they are two separate entities in the same window.  As for colors, well, skies are generally blue but I've used purple, amber and even orange so as I said, there's no right or wrong here.

Finally, and mark my words on this.  The minute someone sees your color combination that's what they are going to swear is what they have to make theirs look like.  It's just the way things work out.  So don't be afraid to change things, just do it!  Start with a color you know you want to use, cut it out and then decide on the next color.  That's the best way to get a great looking window.

Ok, so first up we have Cindy's Sunflower window and just look at those three different shades of translucent yellows that she used for her flower petals!   Even the brown flower center is see through and that's what makes this window look so great-- it all flows together..


Then we have Linda F's Flower In A Teacup which looks like a fairly easy piece until you examine the handle of the cup.   To cut that she made sure that she cut the inner curve first and after that was removed she went around the outside edge of the handle.   We ALWAYS cut out our inside curves before removing any other parts of the glass because those act as support. Beautiful!


Lisa made this beautiful Sunflower while at hone-- she's got a brand new workshop and she isn't going to let it sit empty!  I love that she framed this piece in wood.  It gives it a nice finished look.  Wonderful!


Mary Grace started and finished this LadyBug Lawn Ornament in class this week and then added some wire work to give the wings a little something extra.  This is a job well done!


Our last completed project was made by Betty.  She sure loves this Lily Panel and it certainly loves her because I've haven't seen her make a bad one yet.


Now Cindy is working on a nice tall Sunrise Window and she's only got a few pieces of sky left to go before she can tack this and then work on a border.  This has to be a certain size when it's completed so she's being very careful that nothing crosses any lines which would then alter the size of the window.  Precision cutting is of the utmost importance when making windows to fit into an opening.


Meanwhile Lara got the border and a zinc channel attached to her festive Flower Window.   This is going to be one in a set of three windows with this being the largest of the three.  Seeing how quickly Lara breezed through this I can't imagine that the others will take her long at all.


This week we saw Lisa begin work on a Butterfly Window with a bit of a twist.  Each of the four sections of the Butterfly's wings depicts a scene featuring a stage of its life.  Here you can see a caterpillar beginning to take shape around the outer edge of the bottom right wing.   These are tiny pieces but Lisa is moving through them with the greatest of ease.


Susan D completed Ali the Dog a few weeks ago and now she's working on a Cat Window.  Maybe she'll do a donkey next, who knows.   But I wouldn't hold my breath if I were you.  This is another pattern that Susan D drew up herself and I must say that she does have the hang of this now.


Look out because Linda L is back in action! It may have been a while since Linda  has been able to show up for class but she's retained every bit of knowledge that she's learned all the way back to day one.  Below you can see that she's cut out and ground two Baby Boy Suncatchers entirely on her own.  Talk about not missing a beat!


Belinda has her borders all cut out and she's just about ready to get that final border attached.  I never said a word but the standard question regarding this window popped up all on its own-- is that a shower head or a lamp?   There's no definite answer on that but I always look at it as a shower head.  With all of those windows who needs a light right?  But then again, at night you want a little light, right?  But it doesn't really matter at all because Belinda has turned this into perfection.


Linda F cut out, ground, and wrapped this large Owl Suncatcher while at home and after finishing up the work on her Flower in a Teacup she tacked this together and then began soldering it.  This will surely be completed upon her return.


Lastly I have a bad picture of Martha's Franklin Street Lamp which she wrapped while in class.  I forgot to take the picture and realized it while we were at the car so I pulled out my phone and snapped a number of very blurry images because my lens had fogged up!  I've sharpened this one up as much as I could and I think you can see that she got a lot done indeed.  She's just got about 7 pieces of background left to grind and then she'll move along to her border.


Okay so we were missing quite a few students this week but that was a nice way to ease back into the normal routine.  Hopefully things will be even more normal next week but we'll just have to wait and see.

Paul
Bayou Salé GlassWorks