Okay, so when Bonnie, Fay, Judy and Pat arrived we did some introductions, filled out some paperwork and then settles down to a quick glass cutting lesson which lasted about an hour. No one had ever cut glass before but everyone took to it easily and by 9:30 they were each cutting glass like a pro. Here's a look at the crescent moons they all cut after working through a series of straight cuts, curves, and complex curves. Not bad at all.
Let's go down the list in alphabetical order which means that we'll start with Bonnie. After cutting her paper pattern into individual pieces she then began laying out those pattern pieces onto the different colored glass. after tracing each piece with a fine point marker she started actually cutting the glass. About 45 minutes later this is what she'd accomplished.
The next morning (Sunday) all of her pieces were ground and then wrapped. The pieces were tacked together and then we added a glass border. Next came the soldering process. The idea is to melt a bead of solder onto the copper foil that we surrounded all the glass with. Bonnie has her first side done and is working on the back side in the picture seen below.
And this is Bonnie's completed window. I must say that she handled the soldering easily. This is a beautiful window and Bonnie did a great job making it.
Next up we have Fay, and as you can see she moved along with the cutting of her Fleur De Lis in a quick and easy manor. What you see below isn't even ground and it already basically fits the pattern. That means that her grinding will go easily.
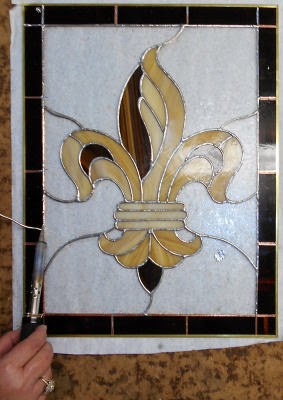
Once her grinding was complete we wrapped all of her glass in a copper foil which is what the melted lead adheres to. The window is completely wrapped in this picture and is waiting to be tacked together before we add the final pieces of glass that make up the border.
Fay was concerned about the glass we had originally picked out for her border so she used the same dark brown that's actually used in the Fleur De Lis itself for her border. The front side of her window is completely soldered in this picture which means that all she needs to do is flip the window over and then solder the back side.
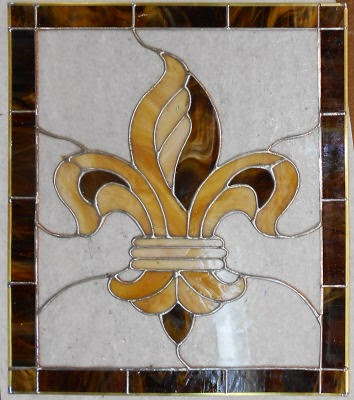
You can easily see the difference in the borders here in this picture because we have some light behind the finished window. It's amazing what a difference some light behind the glass makes to the finished color scheme. Her Fleur De Lis is perfect and I couldn't complain about any of the work that Fay did while she was with us.
Then there's Judy who handled the glass cutting lesson flawlessly and couldn't wait to get started cutting actual usable pieces of glass for her window. She's well under way as you can see here.
With her confidence building, Judy finished cutting her clear background glass quickly and efficiently and then began grinding her pieces to ensure that perfect fit. As you can see, there's not much left to go and this was were Judy was when we called it a day.
Next we see Judy's window all fitted together and wrapped. The next step is to tack everything with solder so the pieces can't shift and then add the border pieces. Adding a border is simple because we use a strip cutter to make nice even cuts. Within 5 minutes all the pieces were cut and then there was another half hour spent skimming the pieces along the grinder and finally wrapping them with the copper foil.
Judy's finished window is a work of art that I would hang beside my own work without any hesitation at all. She certainly seemed to enjoy herself while she was in class and is now on our waiting list to get into weekly classes. I know that when she comes back she'll do great things.
We'll now move along to Pat who really had an easy time with her cutting and moved through her glass easily. In no time at all she the hardest cuts made and then started working on the longer, less complex cuts. Contrary to popular belief, long gradual curves are easy to cut out. It's the small deep curves that are more difficult.
Grinding went really well for Pat. In the picture below you can see that she only has 3 pieces left to grind before calling it a night. Notice how everything fits together so nicely? That means her window is most certainly going to look great. When working with glass it's important not to rush things because that's when imperfections become very apparent.
With the front side of her window soldered, Pat is tackling the back side. By simply taking her time and allowing the lead to completely melt a bead will form naturally on its own. Solder will smooth itself out if it's completed melted before you move the soldering iron. There's really just border left to solder at this point and straight lines are the easiest to manage.
Pat's finished window, like all the others, is something she should be proud of. As you can see she used the same brown glass that Fay did for her border. There are no faults here and her window is nothing short of gorgeous.
Everyone had a great time (Russ and I included) and we're all going to be meeting again later in the year because Judy, Pat, Fay and Bonnie have all signed up to take one of our Fusing Classes. It will certainly be good to get this group of sisters together again and laugh away another weekend.
Well, I've been saving the best part for last. We were lucky enough to have a live Halftime Show performance by none other than Trace Adkins himself. He played a set Saturday night and the ladies just loved it! Of course, he was at the casino and not here in the shop, but technically he DID perform between classes and everyone was in a great mood the next day because of him. If he ever wants to take classes with us we'll work something out. :-)
Paul
Bayou Salé GlassWorks


No comments:
Post a Comment